This is an old revision of the document!
Table of Contents
Getting Started with mAirList
This article will give you a quick overview of the mAirList Radio Automation and will help you to get started with the software.
Documentation for Version 6.3

Below is the old tutorial for version 5.3 until the documentation for version 6.3 is complete.
Download and installation
Software downloads are generally available here: http://www.mairlist.com/en/download/
You will find that there are usually multiple releases to choose from. If you are new to mAirList, please choose the newest version which is not marked as “beta” or “development”. At the time of this writing (summer 2016), the latest stable release is mAirList 5.3.
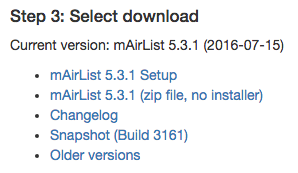
For each release available on the download page, you will find a couple of download links:
- Setup: This is the recommended download, a regular Windows installer that will install the software under
C:\Program Files (x86). - Zip: An alternative distribution for advanced users that does not come with an installer, but which is simply unzipped anywhere on your hard disk. One important difference is that the setup version uses a central location for storing the configuration files (the folder recommended by Windows, typically inside
C:\ProgramData), while the zip distribution stored the configuration inside the program folder. This makes it very easy to deal with multiple configurations, but you should never extract the zip distribution inside a Windows special folder, includingC:\ProgramFiles, because mAirList will not have write access to its configuration then due to the UAC. - Changelog: Link to a text file that describes all changes in the latest version.
- Snapshot: Snapshots a preliminiary version, usually released every few days, that include bug fixes or minor improvements for testing. The link will take you to a folder with a setup package, zip distribution and changelog text file.
- Older versions: If, for any reason, you must go back to an older version of this release, you will find it here.
As a beginner, just download the setup and run it.
Demo and trial license
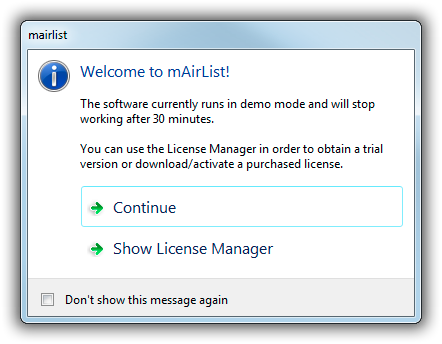
mAirList comes with a demo license that will let you run the software for 30 minutes at a time (you can choose the type of edition during setup). So when you start mAirList for the first time, you will probably see a message like this:
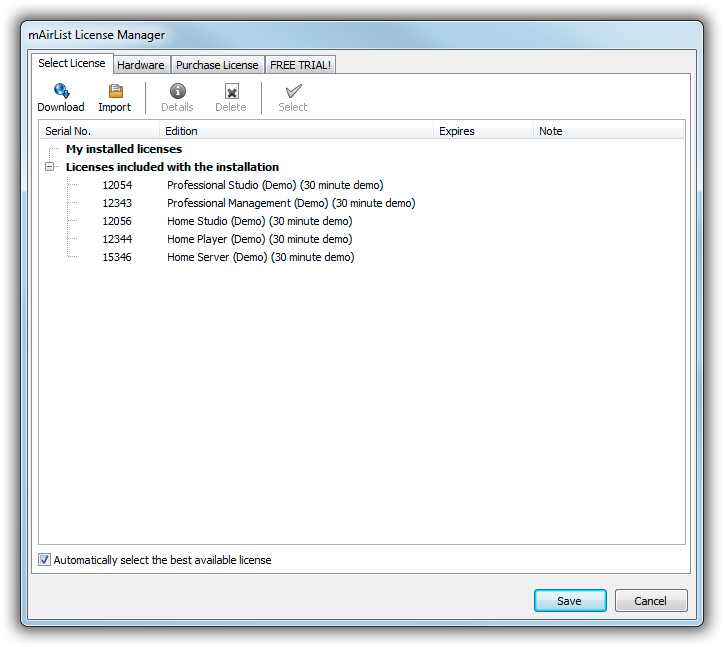
In order to activate a 14-day trial version or install/activate a purchased license, open the License Manager from that dialog:
To activate a purchased license from your mAirList customer account, click the Download license and follow the instructions on screen.
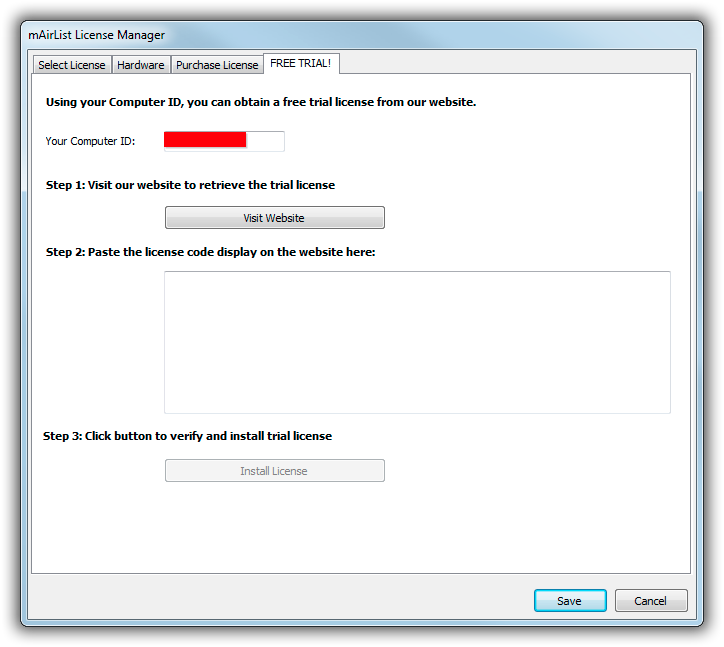
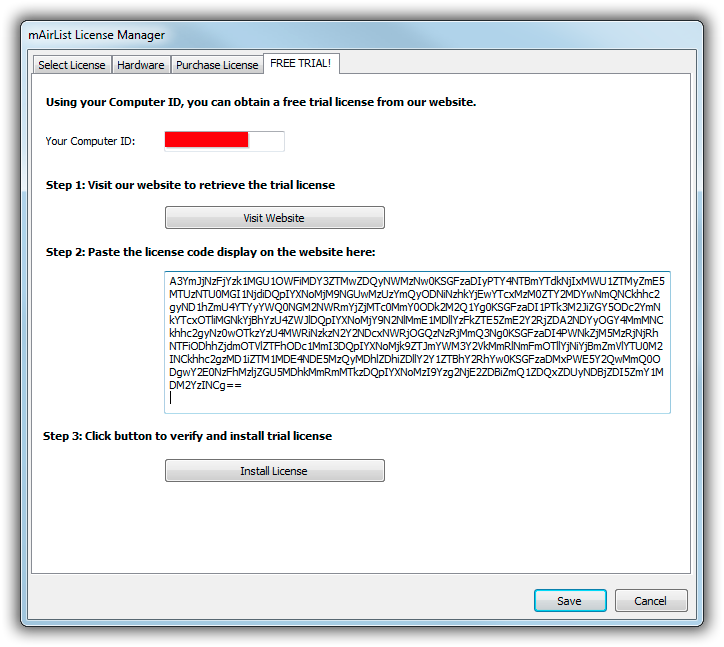
The 14-day trial can be found on the rightmost tab of that window:
Click the Visit Website button and follow the instructions displayed in your web browser. As part of the process, you will be asked to copy a text block back into the License Manager:
Now click Install License, then close the License Manager, and your 14-day trial is ready to use.
If, for any reason, you need to run the License Manager again later, you will find it in the mAirList group of the Windows Start Menu, or in the About dialog inside the mAirList main window.
Updating
Updates within the same minor version (e.g. 6.0.0 to 6.0.1, 6.0.2, 6.0.3 and so on) can just be installed by downloading and running the new setup - it will install “on top” of the current installation, replacing all files with the new version.
Each new minor release (when the middle version number changes) will be installed as a separate application. This is so you can keep your existing installation intact while configuring and testing the new version.
So for example, when you have 6.0.3 running and run the setup for 6.1.0, you will see two applications in the Windows Start Menu, “mAirList 6.0” and “mAirList 6.1”.
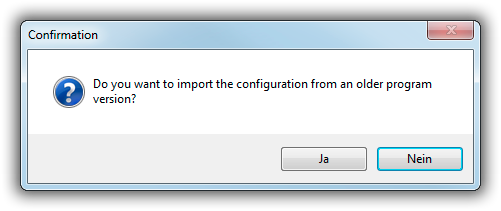
The new version will install without a license file and with a blank configuration. So the first step is to download your license using the License Manager. Thereafter, run the configuration app from the Start Menu. It will prompt you to migrate the config from the older version:
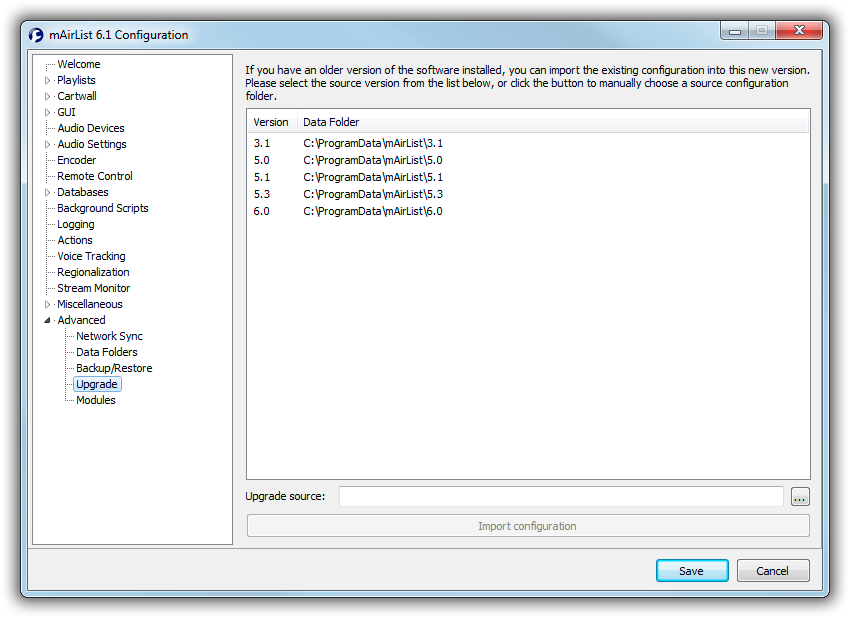
Click Yes, then select the old version:
During the migration, all configuration files from the old config folder are copied over to the new config folder. If you are using a mAirListDB in “local mode”, and the database file is located in the data folder of the old version, it will be copied as well.
Once the new version is up and running, you can safely uninstall the old one from the Windows Control Panel.
Main window overview
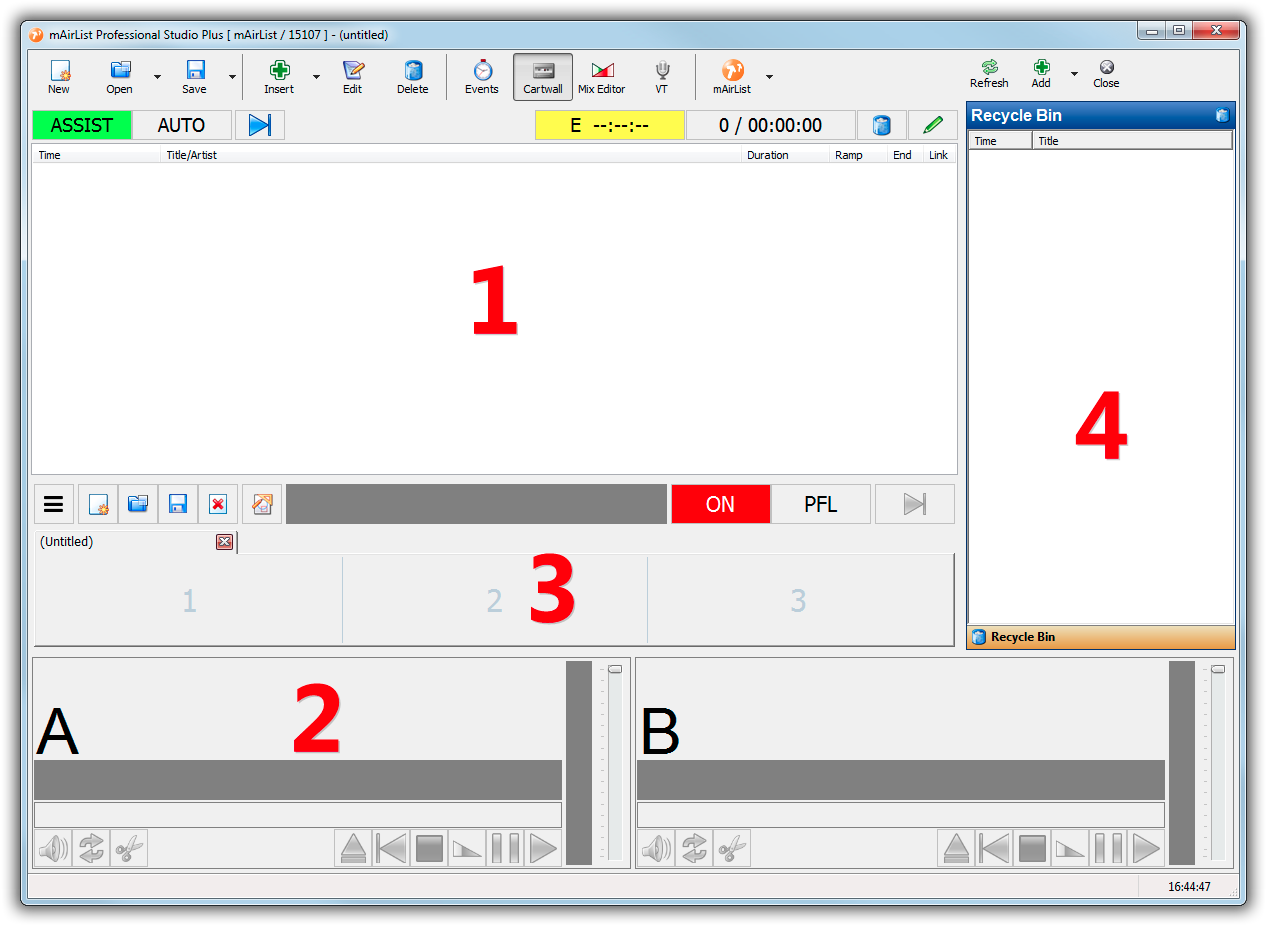
We are now ready to run mAirList for the first time. This is what the main window (or playout window) looks like:
The most important areas of the main windows are:
- Playlist: This is where you load or insert the audio files to be played in your rundown.
- Players: They will be used to play the audio items from the playlist (1). In the default setup, there will be two players named A and B, but you can change the number and names of the players in the configuration app (see below). Typically, if you use a mixing console (which is recommended), you will have one player per PC channel on your console.
- Cartwall: Contains slots/players for additional audio files. Often used for things like jingles or music beds.
- Browser: In this area, you can add tabs with file browsers, database etc. for easy access to your audio files and playlists.
Working with the playlist
The first thing we learn is to work with the main playlist and players.
Add audio files
Before we can play audio items in the main players A and B, we must add files to the playlist. There are many ways to do this, e.g.:
- Drag audio files from Windows Explorer into the playlist
- Use the Insert button in the main toolbar
- Open a playlist file from the menu next to the Open button in the main toolbar
- Open a directory in the browser area (4), then drag items from the browser into the playlist
- …
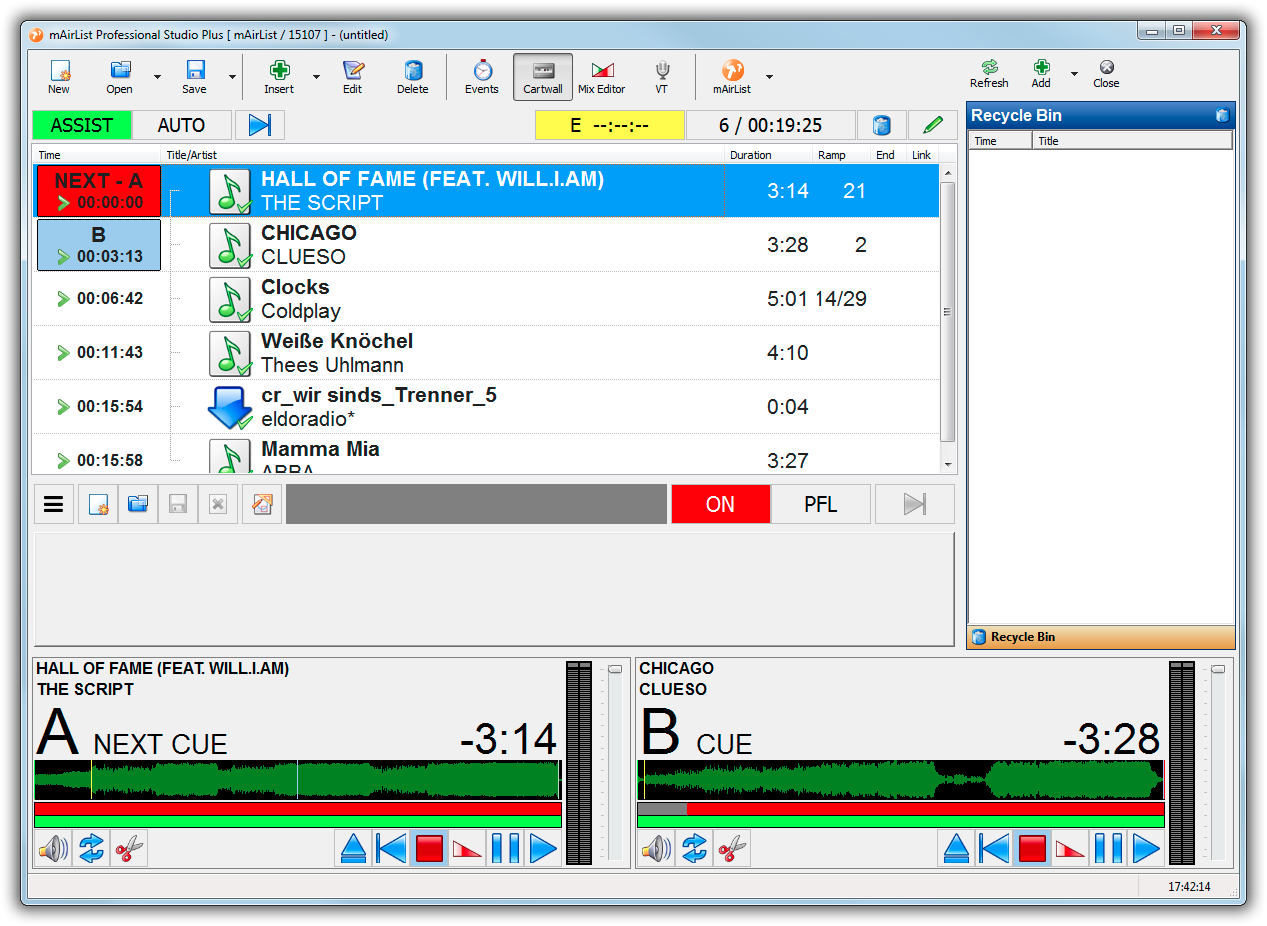
The players are set to Auto Load mode by default, so as soon as you add files to the playlist, the players will load the topmost items automatically:
ASSIST mode
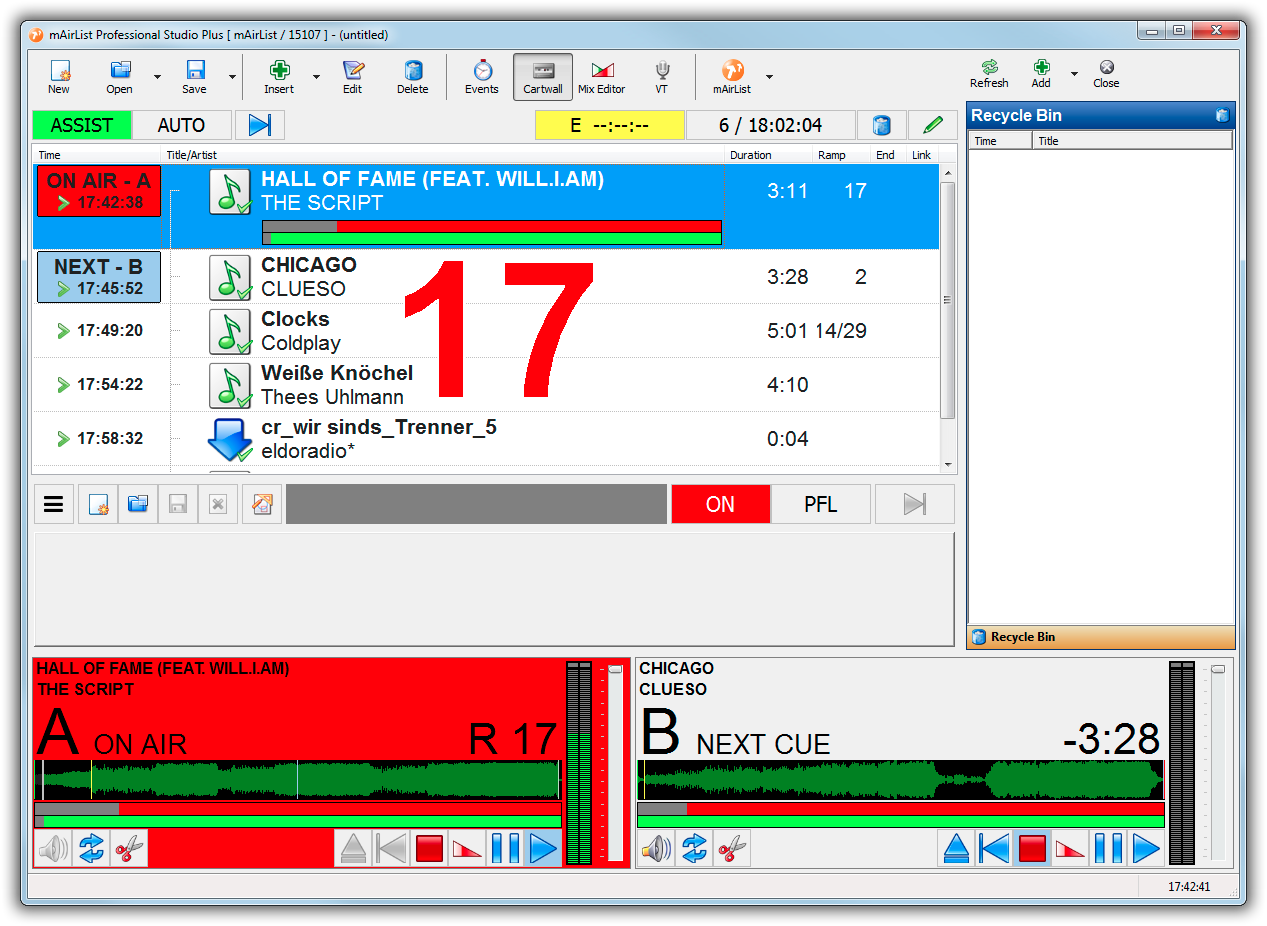
ASSIST mode, also called Live Assist, is the operation mode where a DJ is present and operating the studio manually. It's called live assist because you will find various features that will assist the DJ in this task, e.g. ramp/intro display etc. To start a player, just click the Play button:
Do you see the big red numbers? This is the ramp countdown, because the song happened to have cue points set already. You will learn how to do this using the Cue Editor later in this tutorial.
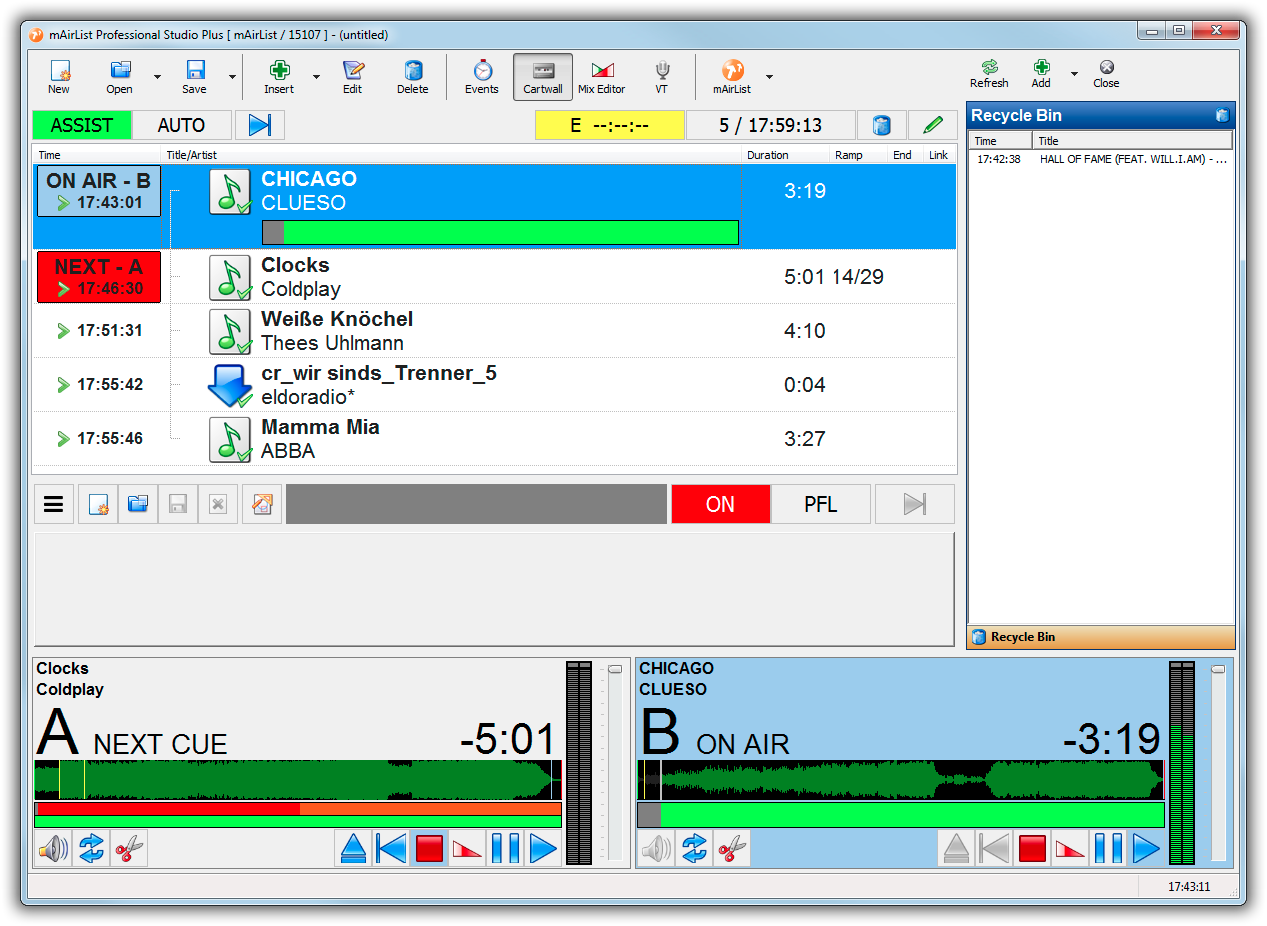
Wait for the first song to finish, or click the Fade Out or Stop button, then start player B:
Notice that the first song is automatically removed from the playlist and moved to the Recycle Bin browser on the right. This behavior can be adjusted in the config later.
Starting and stopping the player is usually not something you would do with the mouse in a real studio. Instead, mAirList offers various remote control options. We'll discuss the basics of remote control later in this tutorial.
AUTO mode
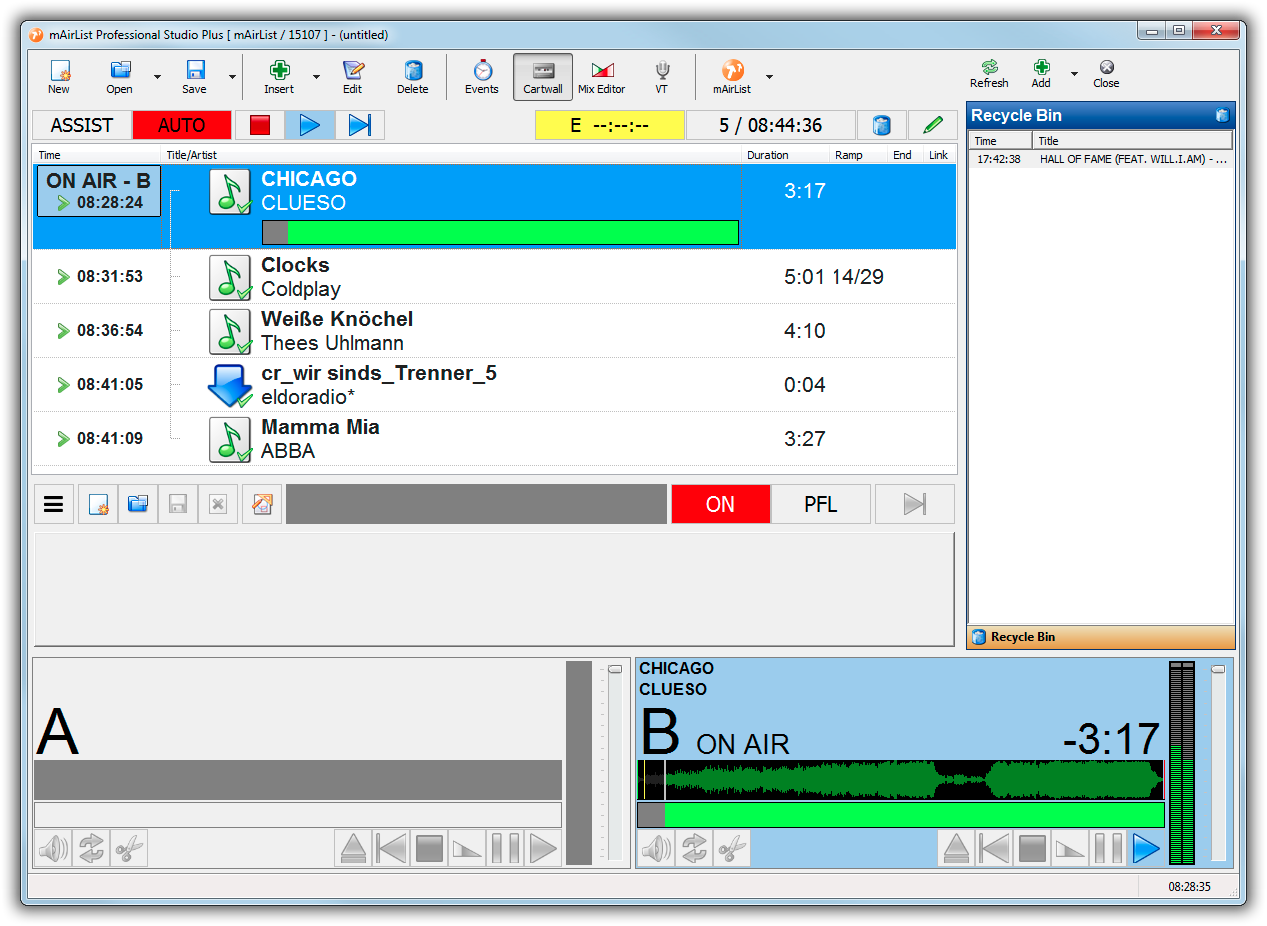
By clicking the red AUTO button in the toolbar above the playlist, you engage automation mode. While in automation mode, mAirList will start and stop the players automatically, playing the items in the playlist one by one.
You can toggle between AUTO and ASSIST mode at any time by clicking the buttons in the toolbar. Depending on the configuration, mAirList will either use the players A and B in turn, or play all songs through a single player (either player A, or the one that was active by the time you switched into AUTO mode), while still handling fades correctly. The latter mode is very convenient when you use multiple channels on your mixing console, because you do not have to open or close faders when toggling AUTO/ASSIST mode.
Fades and Auto Cue
Unlike primitive “jukebox” software, mAirList does not have a fixed crossfade setting that will fade out all songs x seconds before the end. That's because we believe that in professional radio, every song requires and deserves a distinct fade point. So instead of a fixed crossfade time, mAirList uses the Fade Out (and possibly Start Next) cue markers set for the song in the Cue Editor to determine the point where the next auto item should be started.
Setting a proper Fade Out point for all songs in your library is an important but also time-consuming task. mAirList's Auto Cue feature will help you by making a guess based on the audio level whenever you add a new song to your playlist or database library (also for the Cue In and Cue Out markers that cut off any silence and the beginning and end of the song, respectively). This will lead to a fair result in most cases, but you can still adjust the Fade Out marker manually when required. If you feel that Auto Cue is setting the markers incorrectly all the time, you may also adjust the Auto Cue level thresholds in the config.
Prelistening (PFL) and the Cue Editor
The playlist offers two basic ways of prelistening (or “PFL'ing”) to a song before playing it on air, and possibly adjusting its cue markers.
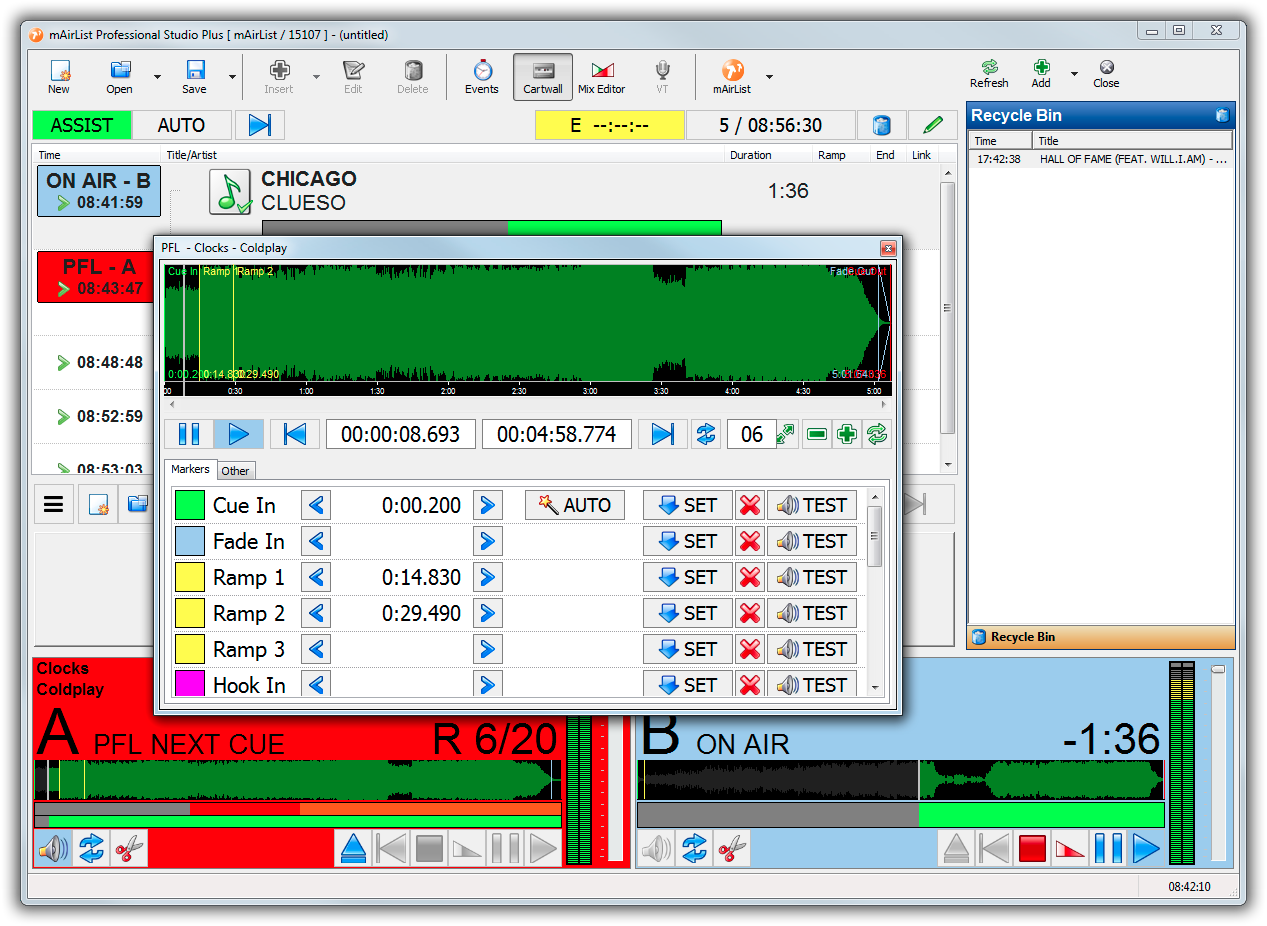
The first method is to double-click an item in the playlist to bring up its Properties dialog, and then switch to the Cue Editor tab. As a shortcut, right-click the item and choose PFL from the popup menu, this will open the Properties dialog, switch to the PFL tab and start playback right away:
The second method can be used for items that are already loaded into an (idle) player. Just click the small “speaker” button in the player - it will start playing in PFL mode and also bring up the Cue Editor window:
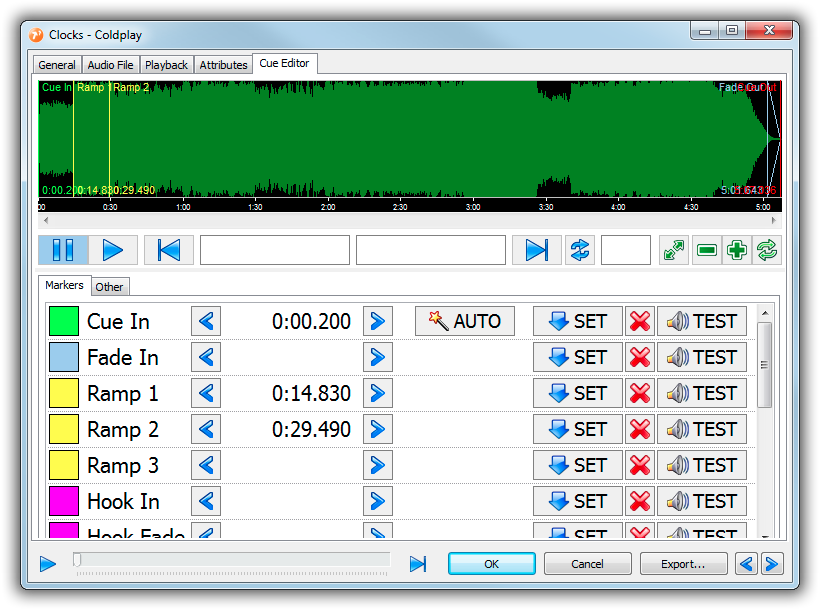
In the upper part of the Cue Editor, the audio waveform of the item is displayed. It is generated in realtime, so it may take a few seconds before it is displayed, depending on the file size. Use the mouse buttons and mouse wheel to navigate or zoom into the waveform.
The buttons below the waveform are used to start/stop playback, engage the END MON function (which will play the last 10 seconds of the item), or zoom the waveform if you decide not to use the mouse wheel for that.
And then there is the list of cue markers:
- Cue In: The point where playback starts, typically used to cut off any silence at the beginning of the track; will be set by Auto Cue for any new track.
- Fade In: The point where the full volume is reached, so you get a fade from Cue In to Fade In. Very rarely used in radio, left empty most of the time.
- Ramp 1/2/3: Also called “intro”, the point where the vocals start, or another significant change in the build-up of the song takes place. When you set this, you will get a nice coutdown and progress bars during playback.
- Hook In/Fade/Out: The section of the song used for hook promos.
- Loop In/Loop Out: The section of the item used when playing in Loop mode. Can be used for music beds etc., very useful when playing through the Cartwall.
- Outro: The opposite of Ramp, the point where the vocals end. The progress bar will turn into a different color at this point.
- Start Next: The point where the next song is to be started in AUTO mode. When left empty, the next song will start at Fade Out, Cue Out or EOF.
- Fade Out: The point where the song is to be faded out in AUTO mode. Will also start the next song unless a specific Start Next marker is set. This point is set automatically by the Auto Cue function and can be adjusted manually.
- Fade End: Can be used together with Fade Out to fine-tune the duration of the fade.
- Cue Out: Where playback stops. Just like Cue In it's used to cut off silence, and set by Auto Cue.
- Anchor: A special point that facilitates backtiming calculations when using Fixed Times (not part of this tutorial). When this marker is set, all timing calculations will refer to this point rather than the beginning (or Cue In) of the item.
Operations on cue markers can be made using the buttons in the table, or straight within the waveform display:
- To set a cue marker, click the SET button during PFL playback, or drag it with the mouse from the list into the waveform.
- To adjust the position of a marker, click the arrow buttons, or move it with the mouse in the waveform display.
- To delete a marker, click the X button, or use the mouse to drag it out of the waveform.
- To prelisten to a marker (start playback from the associated position), use the TEST button, or double-click the marker in the waveform.
- To re-engage the Auto Cue function, reverting any manual changes, click the AUTO button. This is only available for Cue In, Fade Out and Cue Out.
Note that cue markers are not permanently preserved unless you export them to the file tag, MMD file, or a database. See the section on storing metadata below.
Mix Editor
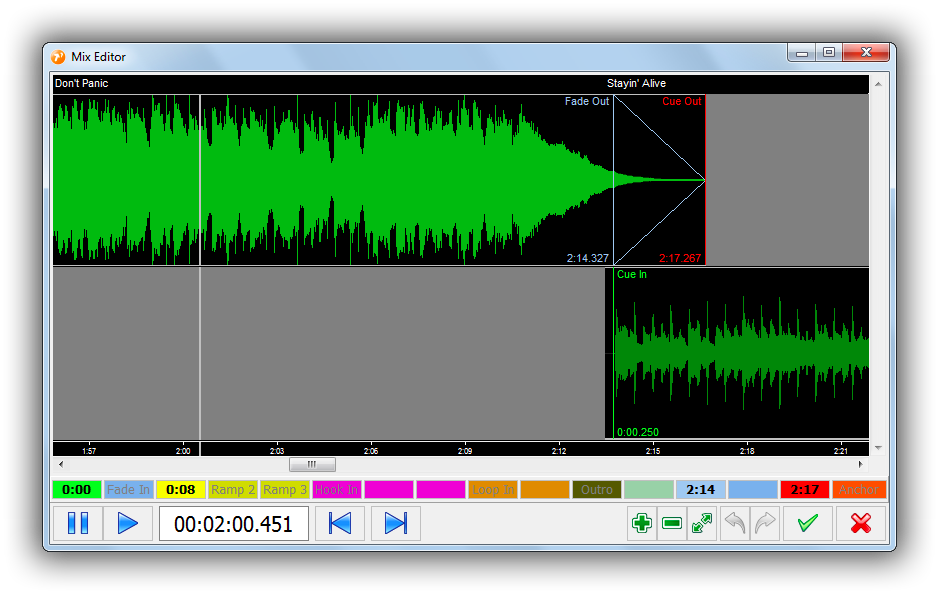
The Mix Editor is another way to edit the cue markers of one or more items. It is some sort of multi-track cue editor. You can open it in various ways, the easiest is to select two or more items with the mouse (hold down Shift), and then click the Mix Editor button in the toolbar.
Setting and adjusting cue markers in the Mix Editor works pretty much like the Cue Editor, just drag them around with the mouse (to set a new marker, drag it from the respective button at the lower edge of the dialog into the waveform). You can also drag the entire waveform with the mouse in order to adjust the Start Next marker of the preceding items. The Mix Editor has a built-in prelisten function, and changes you make are reflected in the audio output instantly.
Editing metadata
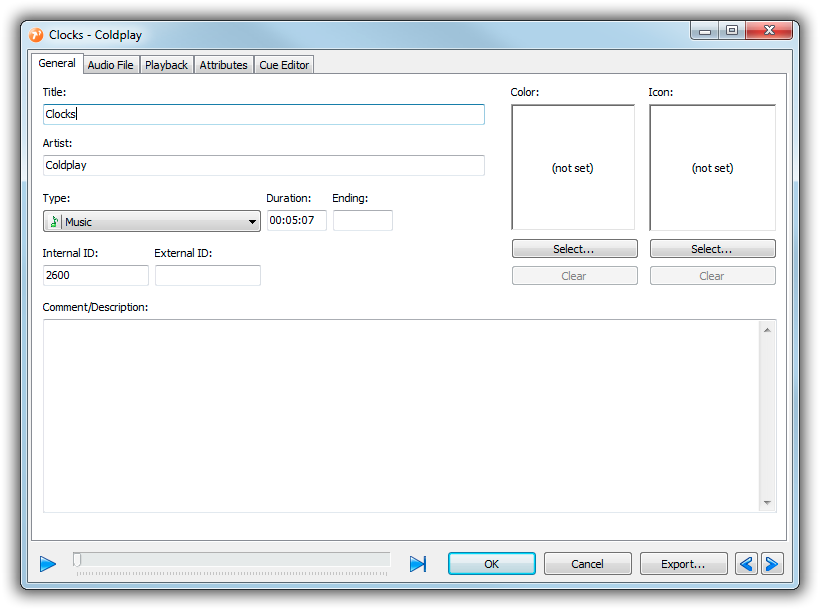
When you explore the other tabs of the Properties dialog, you will find that there are many other things you can edit here. The most important tab would be the General tab which allows editing of the basic metadata fields like artist, title etc.:
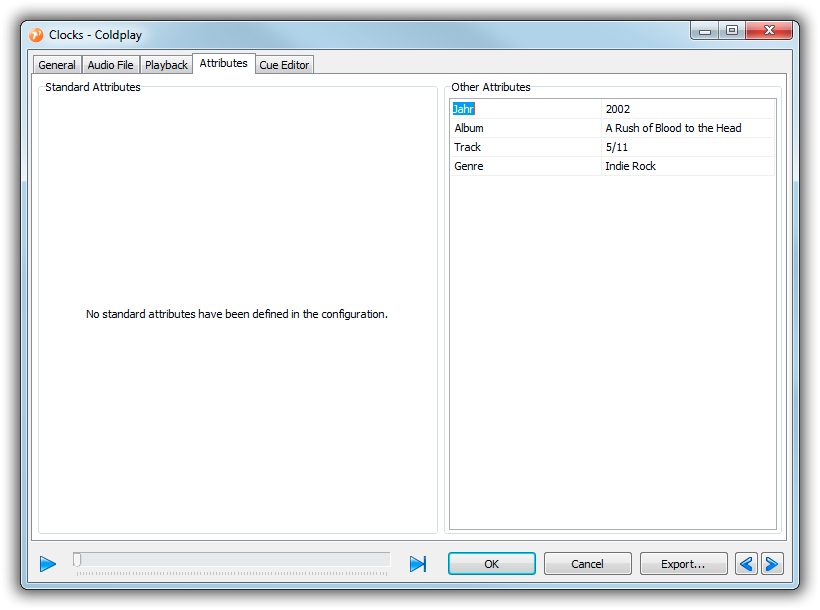
Another important tab is the Attributes tab. In mAirList, “attributes” are simply name/value pairs that are used to store any kind of metadata for a song. When you add a new audio file that has a supported file tag (e.g. ID3 for MP3 files), mAirList will import the existing file tags (e.g. album name, genre, year) as attributes.
By default, attribute values are displayed in the Other Attributes section on the right-hand side of the dialog, in a sample table. Use the cursor-down key to add more rows to the table. If there are any attributes that you use frequently, you can define them as “Standard Attributes” in the configuration, and you will get a much nicer input form on the left-hand side of the dialog.
Storing metadata
Any changes you make in the Properties dialog, including cue markers and attributes, will be “volatile”, that means, they are only stored in RAM for the instance of the audio item in the current playlist, and will be lost when you delete the item from the playlist.
To make your metadata changes permanent, mAirList offers three ways of exporting the metadata, found in the menu that appears when you click the Export… button at the bottom of the Properties dialog:
- File tag: Metadata is stored in an XML block in a hidden part of the ID3v2 tag. Only works for MP3 files, and not of the file is currently loaded into a player (the file will be locked on disk then).
- MMD file: Metadata is stored in a small XML file (file extension
.mmd, “mAirList meta data”) alongside the audio file. Works with any file type and is non-obstrusive (original file remains untouched). - Database: Stores the metadata in the database library. Requires a mAirListDB to be set up first.
When you re-add the same file to the playlist or cartwall later, mAirList will detect the existing metadata and use it.
Cartwall
The cartwall offers another way to play audio items, often short elements like jingles or music beds.
In the default configuration, the cartwall is embedded into the main screen and has three slots, or players. The number of slots can be adjusted in the configuration (see below), and you can also opt to have the cartwall in a separate window. In either case, use the Cartwall button in the main toolbar to hide or show the cartwall.
ON, PFL, and OFF mode
The cartwall has three different operation modes: ON (on air), PFL (prelistening) and OFF (when neither ON or PFL is active). This will actually switch the sound card output (and disable some other things like logging in PFL mode) - see the section on audio routing below. When you use remote control with your mixing console, it is also possible to reflect the state of the cartwall channel on the console here (ON = fader open, PFL = fader in PFL/cue mode, OFF = fader closed).
Operating the cartwall
To load an audio item into a slot, just drag it from Windows Explorer, the Browser, or the playlist into an (empty) slot:
Note that the cartwall is multi-tabbed. Click the New Page icon to add another page. When you drag an audio item onto the empty cartwall (with no open page), a new page will be created automatically. You can also replace an existing item on a page by dragging another item on top of it.
Players can only be started when the cartwall is on ON or PFL mode. When you switch from ON or PFL to OFF, all cart players are stopped automatically.
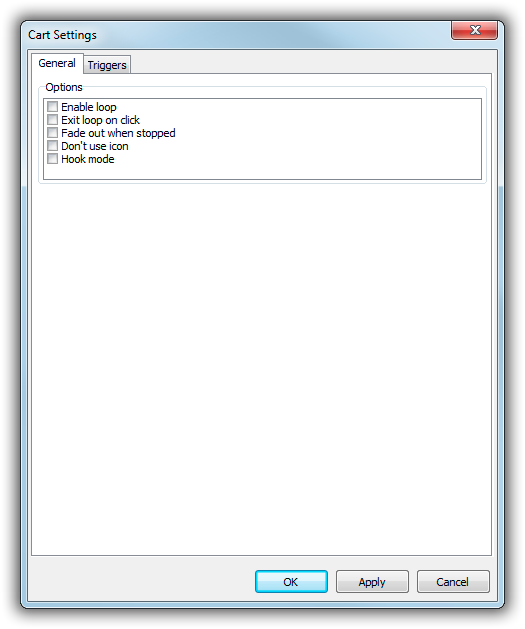
To start a player, simply click it anywhere with the mouse. To stop it again, click it again. If you want the player to fade out rather than stop on the second click, right-click it, select Cart Settings from the menu, and then check the Fade out when stopped option:
Note that the cart players, unlike the playlist players, have no individual PFL function. It's always the entire cartwall that is in PFL mode or not. To prelisten to a cart while the cartwall is in ON mode, select PFL in the cart player context menu. This will open the Properties dialog with the Cue Editor active and playing (see section on PFL above).
Triggers
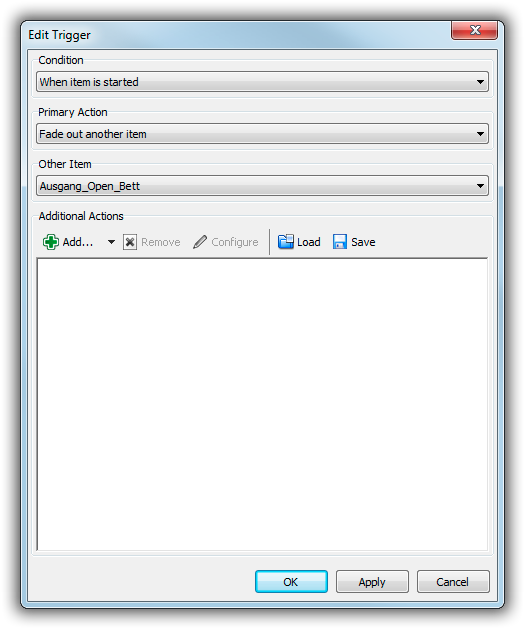
On the Triggers tab in the Cart Settings dialog, you can define actions to perform when this cart item is started or stopped. A typical example is to fade out a music bed on cart 1 when the closer jingle on cart 2 is started:
You can also define additional actions to be performed, e.g. issue another command, or send some signal to connected remote control hardware. Click the Add button and explorer the available actions, there are plenty!
Design Mode
Design Mode is engaged by clicking the Design Mode button in the cartwall toolbar, or by double-clicking the empty space between or around the cart players.
In Design Mode, you can fine-tune the appearance of the cartwall items:
- Close a cartwall item using the X icon.
- Change the color of an item (by clicking the toolbar button next to the Desing Mode button that appears).
- Move cartwall items around with the mouse (even while they are playing!)
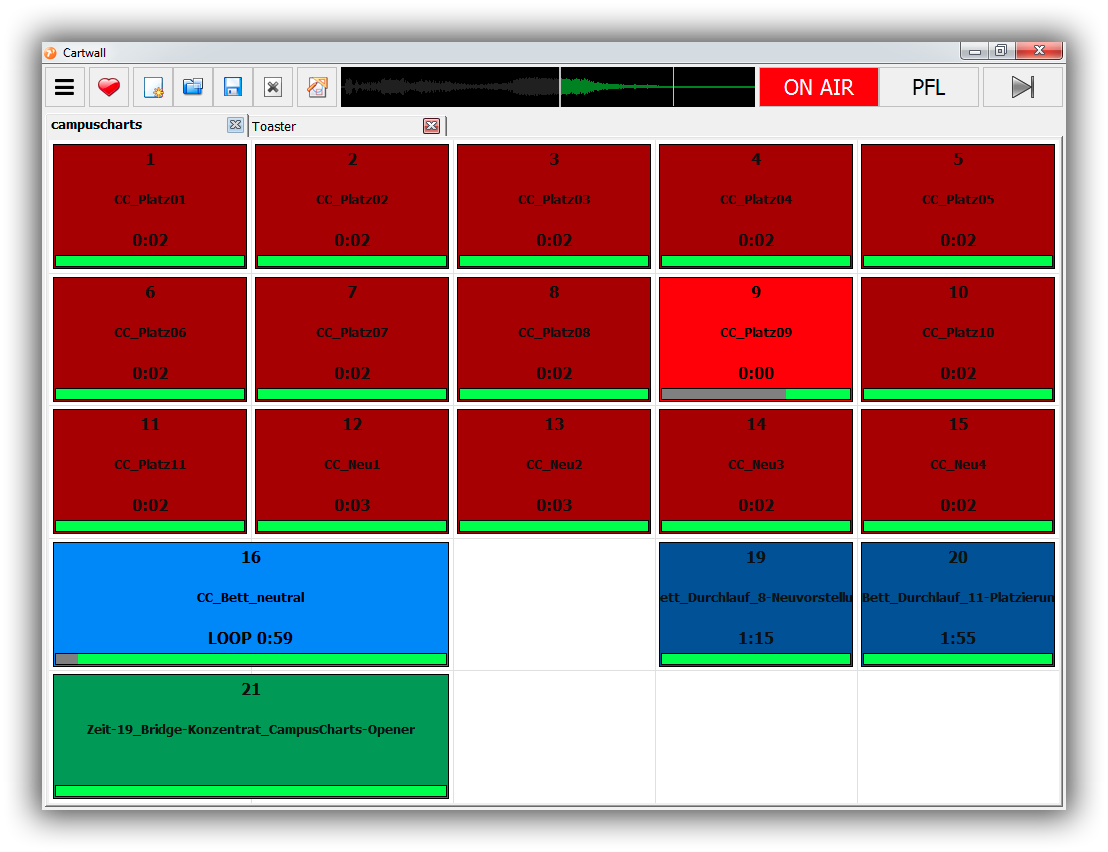
- Resize cartwall items - yes, they can actually span multiple slots/spaces. Not really useful for a 1×3 embedded cartwall, but imagine a huge cartwall with 40 or 50 slots in a separate window on a separate screen; you can make the most important carts on your page bigger, and easier to operate.
Here's an example of a cartwall page in a separate window, with many buttons in different colors and different sizes:
Saving and loading cartwall pages
You can save cartwall pages as *.mcp file and load them again using the Open Page button. It's also possible to specify a set of favorite cartwall pages (or folders of *.mcp files) in the config, and you get a new button with a convenient dropdown menu for quick access to your favorite cartwall pages.
Basic configuration
Up to this point, we have been working with the default configuration of mAirList. In this section, we will show you how to access the configuration of mAirList, and give a very brief overview of the various configuration options.
Configuration app, Control Panel, and temporary changes
There are actually three ways to change configuration options in mAirList.
The first way is to use the standalone configuration app, found in the Windows Start Menu. You must close the main application before accessing the config app. In early version of mAirList, the standalone config app was the only way to access the configuration. The idea was to keep the operator (DJs in your studios) from making permanent changes to the config, so it was “hidden” in a separate app. Even today, some basic configuration options (like the number of players, or GUI configuration) are only available in the standalone config app.
The second way to access the configuration is using the Control Panel, found in the menu next to the About button in the main window toolbar. The Control Panel is actually pretty similar to the standalone configuration app, but only offers a limited set of configuration pages - those options that can actually be adjusted at runtime.
Finally, the user can make a couple of temporary changes to the configuration, e.g. by changing options from the playlist right-click menu. These changes are reset when you restart the software.
In the following, we assume you use the standalone configuration app (which has all pages available).
Playlist and players
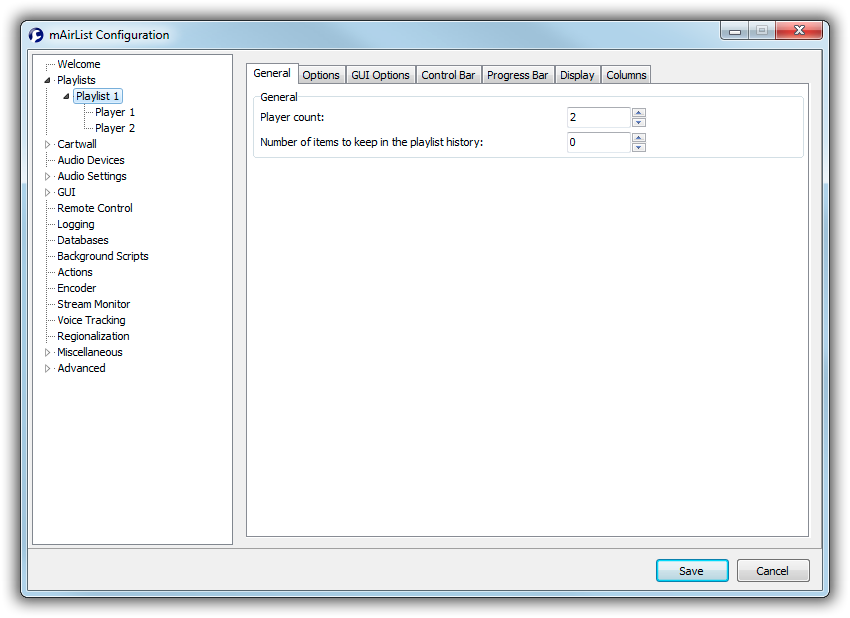
On the Playlists page, you can adjust things like the number of playlists (most people have only one), the numbers of players for that playlist (the default is 2, player A and B), and the various options for the playlist:
The general options are divided into two lists, Options (the way the playlist works) and GUI Options (the way the playlist looks, and the way it is operated). This distinction between options and GUI options can be found in many other places in the configuration. For the playlist, you also have a separate list of on/off options for the control bar (the toolbar) and the progress bar, as well as display and column settings.
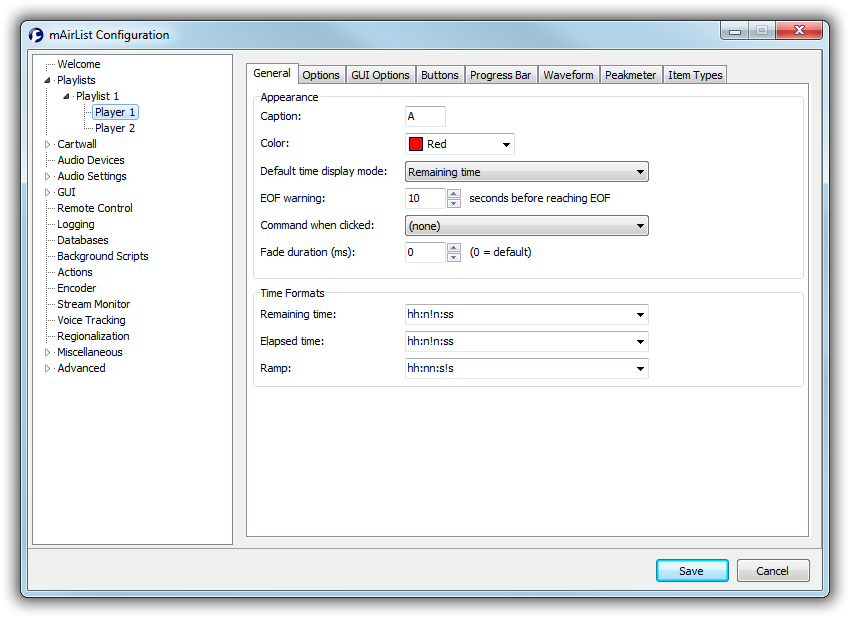
When you navigate further into the menu tree, you get to the options for the playlist players. On the General tab, you can adjust things like the name and the color of the player:
And then again, you have several tabs with options, GUI options, etc.
Cartwall
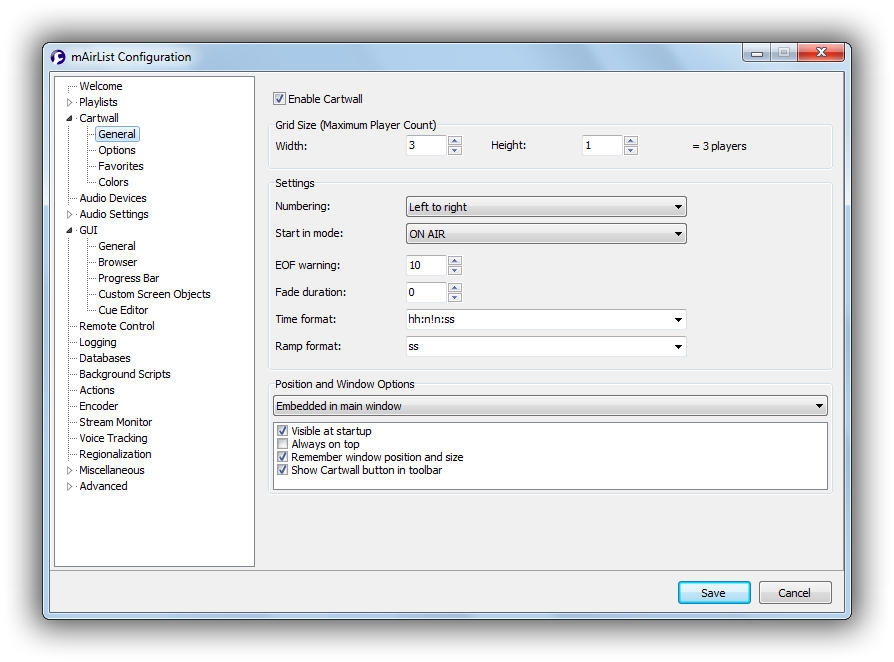
On the page Cartwall → General, you can adjust the basic parameters of the cartwall:
This includes the number of players (grid size), the mode to start in (ON/OFF/PFL), and whether the cartwall should be displayed as part of the main window, or in its own window.
The other configuration pages for the cartwall offer various options and GUI options, a list of favorite cartwall pages (which will appear in a dropdown menu for easy access), and color settings.
Audio routing
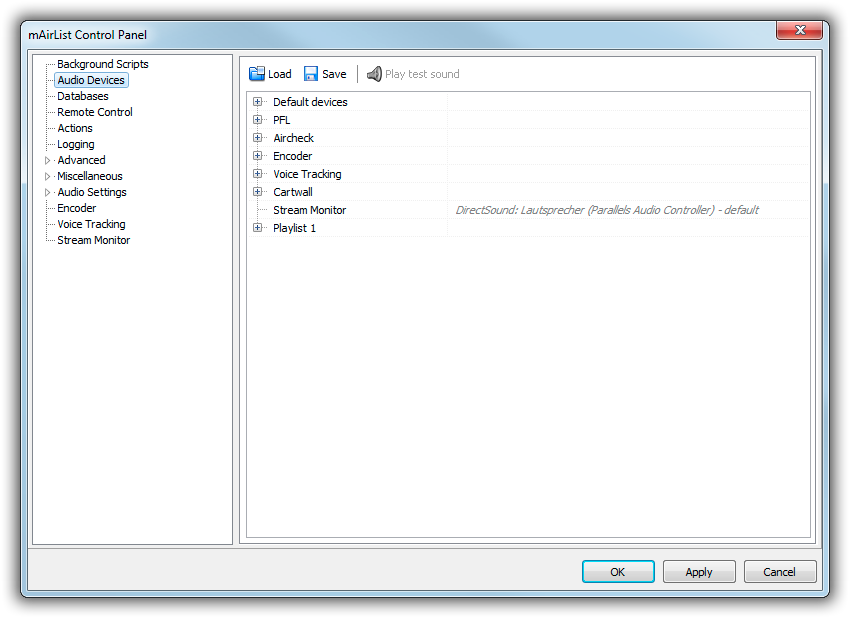
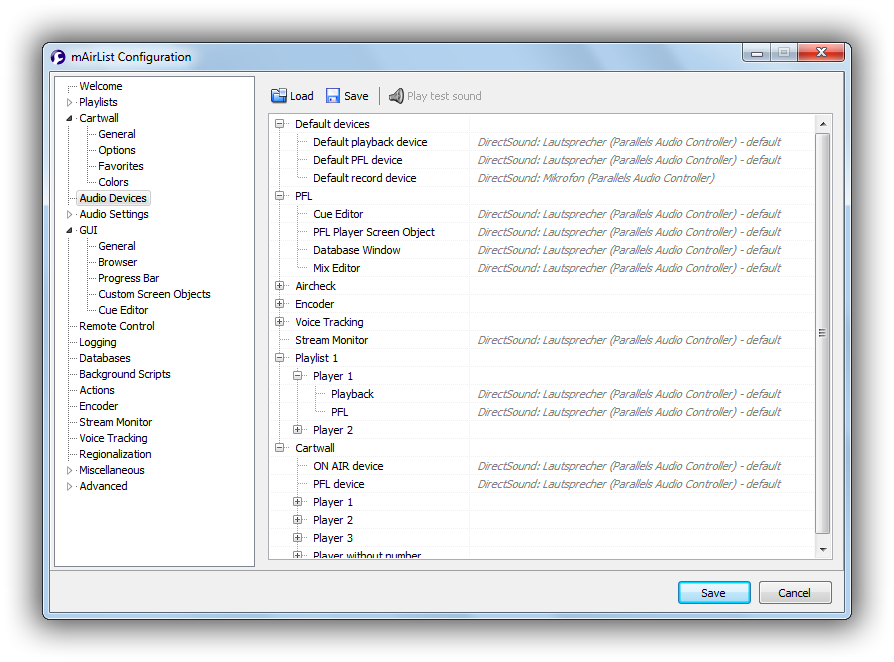
Audio routing is a very important part of the mAirList configuration process. You will find it on the Audio Devices config page:
You can select the sound card inputs/outputs for any kind of audio inside mAirList, including
- default input and output devices,
- output device for any kind of PFL function (Cue Editor, Mix Editor, etc.),
- the (on air) playback and PFL devices for each player,
- the (on air) playback and PFL devices for the cartwall in general, and also for each cart player if required,
- input and output devices for the streaming encoder,
- output devices for regional splitting.
The audio routing uses some kind of hierarchy. For example, when you do not explicitly select a “PFL” device for a particular player, the “Playback” device for that player is used instead. If the “Playback” device is not set either, the “Default” device will be used, and so on. Gray text means that there is no explicit device selected for that input/output, so the inherited device will be used.
GUI screen objects
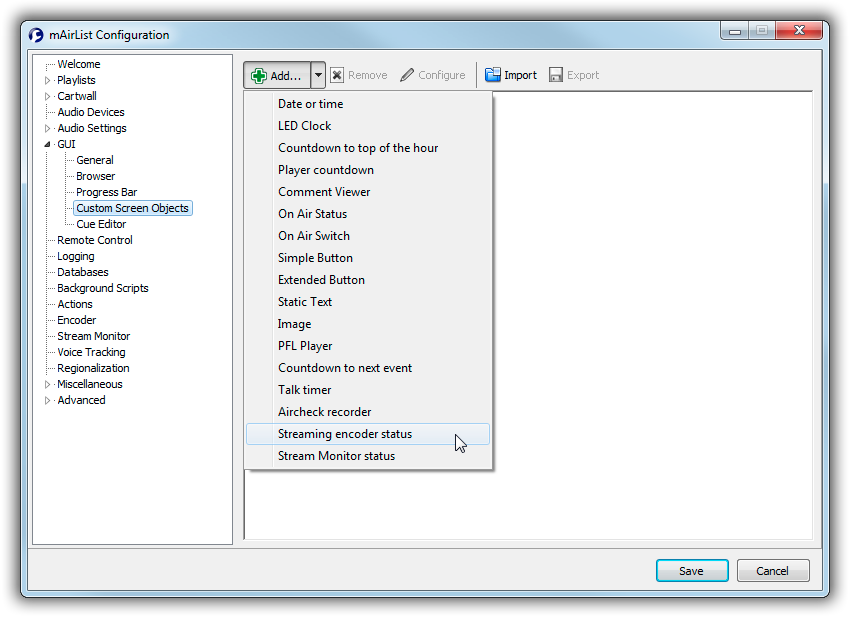
On the GUI → Custom screen objects page, only in the standalone config app, you can add optional objects to the mAirList main playout window:
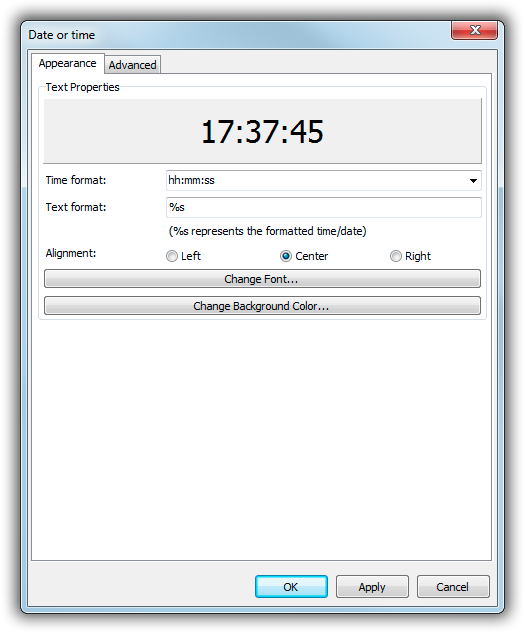
For example, add a larger clock, or an image file with your station logo. Most objects can be customized in various ways. For example, for the date/time object, you can configure the time format, font, color, and more:
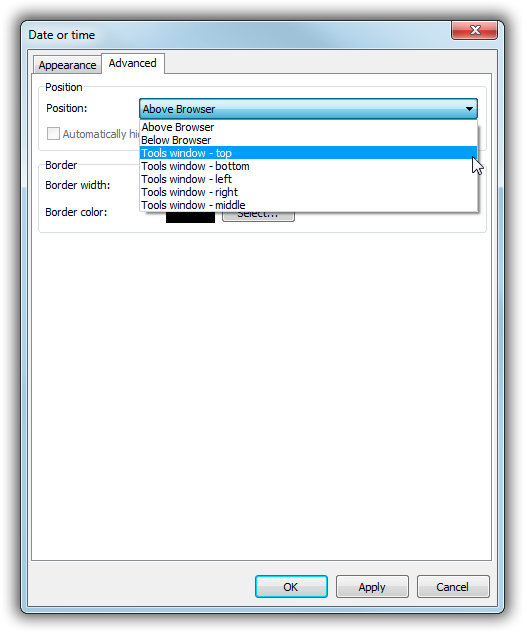
There are two possible places where screen objects appear:
- Above or below the browser, on the right hand side of the main window
- In an extra window that can be accessed through the Tools button in the main windows (this button won't appear until you have at least one screen object set to appear in the Tools window)
This can be adjusted on the Advanced tab of any screen object configuration dialog:
When you use a custom layout, you can rearrange the screen objects (those not in the Tools window) in the Layout Designer.
Remote control
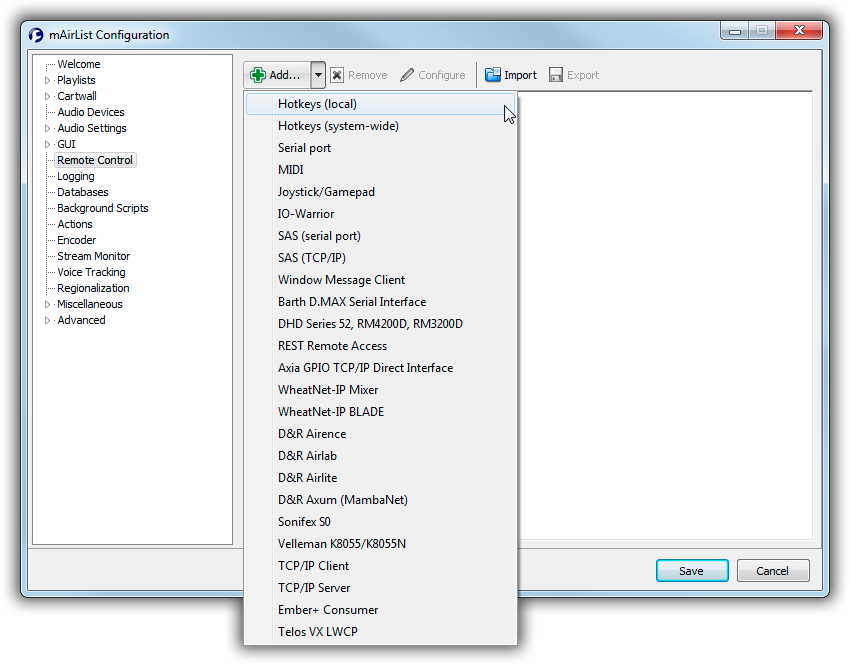
Almost any function in the mAirList system can be controlled remotely by a number of remote control interfaces. You can add one or more remote control mechanisms in the Remote Control section of the standalone config app or the Control Panel. The available remote control interfaces depend on your license.
For example, add a new Hotkeys (local) remote in order to add hotkeys to start or stop players etc. (There is also Hotkeys (system-wide) which will create hotkeys that work regardless whether the mAirList app has focus or not - but those keys won't be available in any other application anymore).
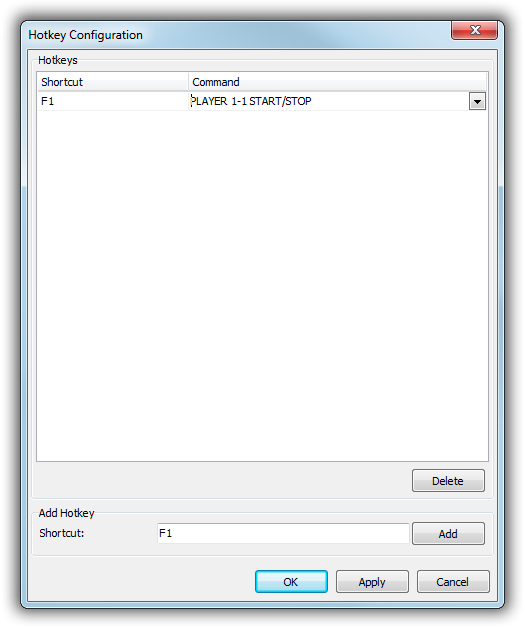
In the hotkey configuration dialog, first click the Shortcut field, and press the desired key, e.g. F1. The key will be added to the table at the top of the dialog. Then use the dropdown next to the key and select a command, e.g. PLAYER 1-1 START/STOP.
Commands are always written in capital letters, and most of them are self-explaining. For example, PLAYER 1-1 START/STOP will start the first player of the first (and often only) playlist, that is, Player A, or stop it if it is already playing.
It is also possible to chain by using a semicolon, e.g. PLAYER 1-1 FADEOUT;PLAYER 1-2 START will fade out player A and start player B with a single keypress. You must type chained commands manually.
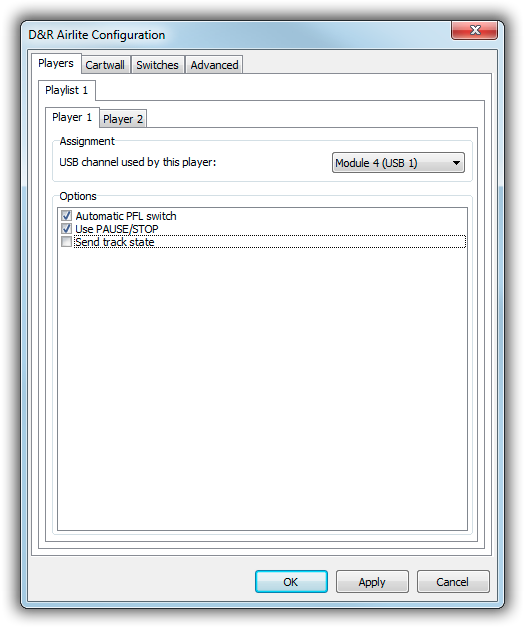
Some remote control interfaces are more sophisticated, and you do not have to deal with these low-level commands at all. For example, when using the remote control interface for the D&R AIRLITE, you just have to tell mAirList which player is using which USB channel on the console, and mAirList will take care of all commands (and also feedback to the desk):
Logging
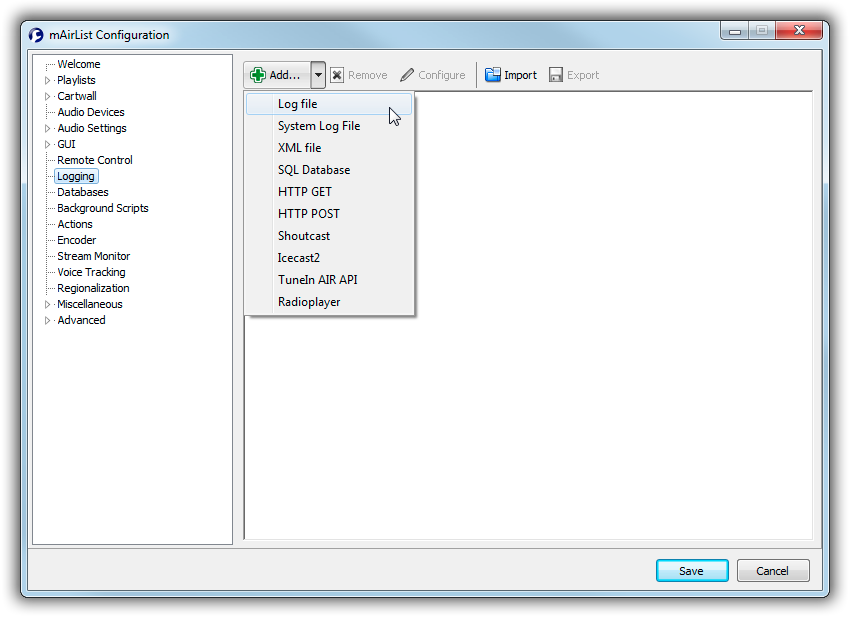
In the Logging section, you can instruct mAirList to send out information whenever a playlist item is started and stopped. There is variety of logging methods available:
For example, you can add a log file where all played songs are written to, or send an HTTP request to your website to indicate the start of a song.
All logging mechanisms use a set of variables that are replaced by the actual item data, e.g. %a for artist or %b for title.
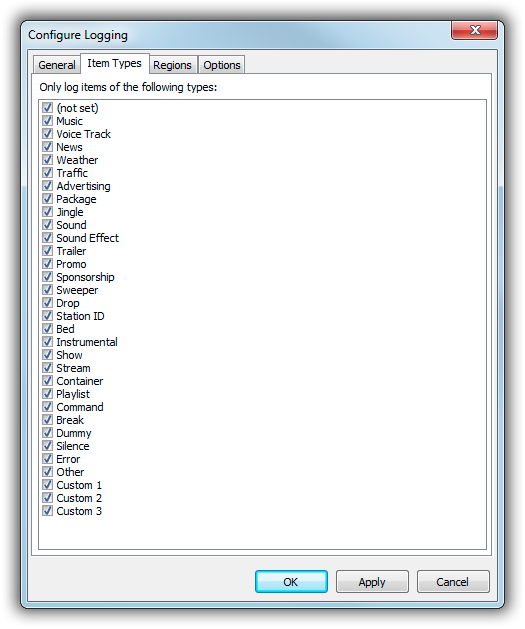
There is a Item Type tab in the properties of any logging mechanism where you can select the type of items to be logged - e.g. to filter out any item type but music for the online playlist on your website:
The values correspond to the “Item Type” setting in the playlist item properties dialog.
What's next?
Here are some advanced topics you may want to have a look at next:

