Table of Contents
File Recorder
Using the File Recorder, you can create timed recordings, from any soundcard input or the encoder master signal.
The File Recorder was introduced in mAirList Professional Studio 6.0.
Overview
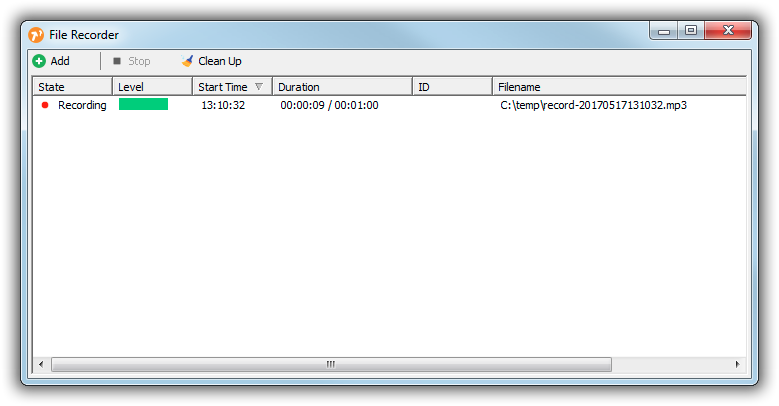
The File Recorder can be found in the mAirList System Menu, next to the mAirList button in the Main Toolbar. The File Recorder window shows a list of active and past recordings, with the ability to manually add a new recording, or stop any running recording:
The Clean Up button will remove all finished recordings from the list.
Manual Recordings
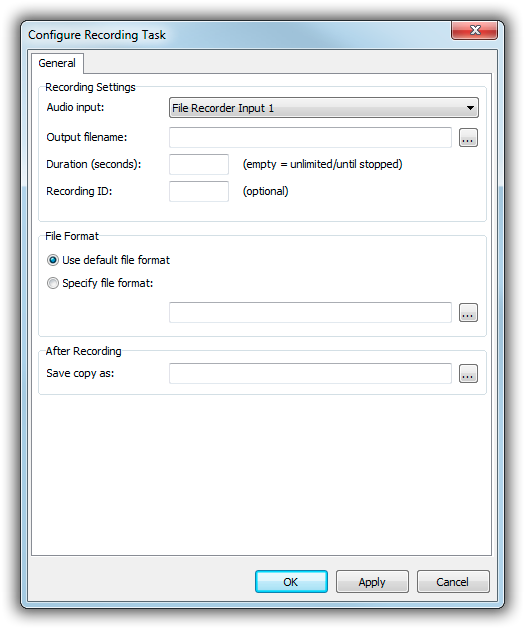
To start a new recording manually, click the Add button in the File Recorder window. A dialog will appear:
- Audio input: Select one of the available File Recorder Inputs. The actual routing to these inputs is done in the configuration app or Control Panel, on the Audio Devices page. There are currently 8 inputs available. (This can easily be increased, please contact support if you need more inputs.)
- Output filename: Select the file where the recording should be saved to.
- Duration: Enter an optional duration, in seconds, after which the recording should stop automatically. Leave this field empty to record for an unlimited time, until the recording is stopped manually or programmatically.
- Record ID: This field is used to tag the recording with a particular identified, so that I can be stopped programmatically. See the section on timed recordings below.
- File format: By default, the default file format (set in the config under Audio Settings → General) is used, but you can set a differnent format for each recording when required.
- Save copy as: Select another filename to make a copy of the recorded file after recording has finished. This is useful if you want to make periodic recordings of a particular show, and save the most currrent one under a fixed filenames for easy rebroadcast.
The recording will start as soon as you click OK. You can stop it manually by selecting it in the list, then clicking Stop in the toolbar.
Timed Recordings
The File Recorder can also be used to make timed, automated recordings, using the Start recording and Stop recording actions, e.g. in the Event Scheduler, or as Actions on start or Actions on stop in the playback settings of any playlist item.
Start recording
Starting a recording is done using the Start recording action, found in the File Recorder section of any Add Action menu.
In the properties dialog of that action, you will see the same settings as described in the section on manual recording above.
Notes:
- You can use Logging Variables inside the filename; e.g.
Recording-%Y%M%D%h%m%s.mp3will incorperate the current date/time in the filename. - Logging variables can also be used in the Save copy as filename; the date and time of the start of the recording is being used when resolving the variables.
- If you want to stop the recording programmatically using a Stop recording action (see below), make sure to enter a unique Recording ID for all recordings.
Stop recording
Use the Stop recording action to stop any running recording. Enter the same Recording ID as being used in the matching Start recording action. You can also use * as a wildcard to stop all running recordings.


