Table of Contents
D&R AIRENCE Remote Control
This article describes the remote control interface for the D&R AIRENCE-USB mixing console.
The AIRENCE is an 6- to 24-channel mixer which includes four stereo USB audio interfaces, and a USB control module for fader start etc., all through a single USB connection.
The AIRENCE remote control interface is also compatible with the AIRLAB USB Control Module.
Audio Setup
The audio setup is not exactly part of the remote control configuration, actually it's entirely separate, but you will find the following remarks useful.
The AIRENCE has four USB channels/faders, labeled “USB 1” through “USB 4” on the mixer surface. These USB channels all have their own USB (stereo) audio interface, all of which are connected to a common USB hub inside the console.
Also connected to that USB hub is the USB control module used for remote control (see below). So there is a total of five USB devices inside the console.
When you plug the USB cable into your computer, Windows will detect the devices one by one, and give the sound cards names like “USB Audio”, “2-USB Audio”, “3-USB Audio” and “4-USB Audio” (names may vary).
It is important to know that the order of these devices is somewhat random, and it does not coincide with the order of the USB channels on the mixer surface most of the time!
So we recommend that you first go to the Windows audio settings, playback devices, identify each USB channel, then edit each device and change it's name (“Speaker”) to something more useful (e.g. “AIRENCE USB 1”). These names will appear in the mAirList audio setup, so you can easily identify the correct USB audio channel.
Each audio device also has a stereo return signal, represented by a record device in the Windows audio settings. The exact signal mapping can be looked up in the AIRENCE manual. The return signal for USB 1 will usually carry the “main” (program) output; use this as the line-in device for streaming.
It is recommended that you use WASAPI instead of DirectSound, as this will avoid mixing up of the several audio devices. Also make sure that you have the console plugged into the same USB port at all times; otherwise Windows may detect all devices as new, breaking your audio setup.
Configuration
The AIRENCE software must be installed on your computer before you can start with the remote control configuration.
Then open the standalone configuration app, or the Control Panel, go to the Remote Control page, and add a new D&R AIRENCE remote.
Players
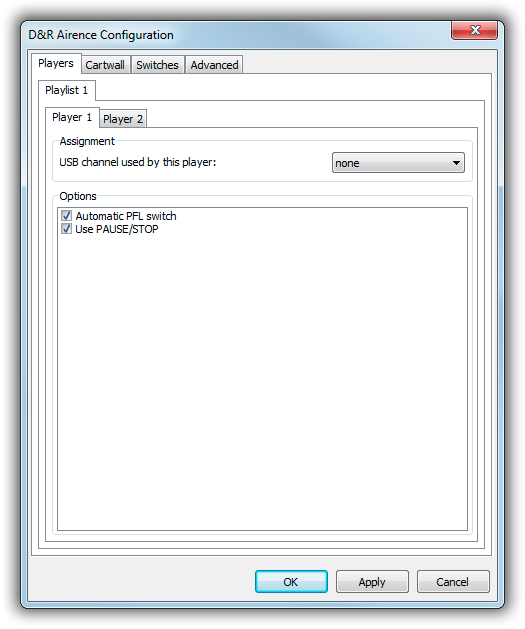
On the Players tab, select the USB channel that corresponds to the respective player:
When you check Automatic PFL switch, mAirList will start the player in PFL mode when you press the PFL key on the console, or switch the channel to PFL on the console when you start PFL in the player with the mouse (or any other remote control mechanism).
The option Use PAUSE/STOP will pause a player first when the fader is closed and no other player is active. Internally, it will use the remote control command PLAYER x-y PAUSE/STOP instead of just PLAYER x-y STOP.
Cartwall
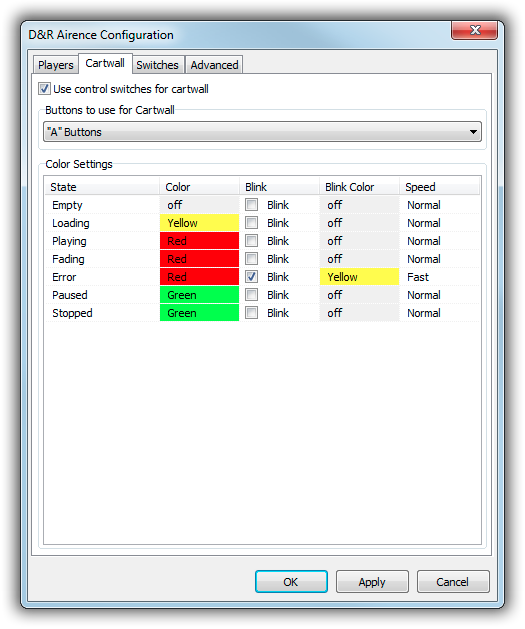
The AIRENCE main unit has 16 buttons, in two rows (labeled “A” and “B”), that can be used to control the cartwall players. If you are going to use these buttons, select the row(s) to use on the Cartwall tab:
You can also customize the way the various states of the cartwall players (empty, playing, etc.) are represented by the color (or flashing) of the associated push button on the console.
Switches
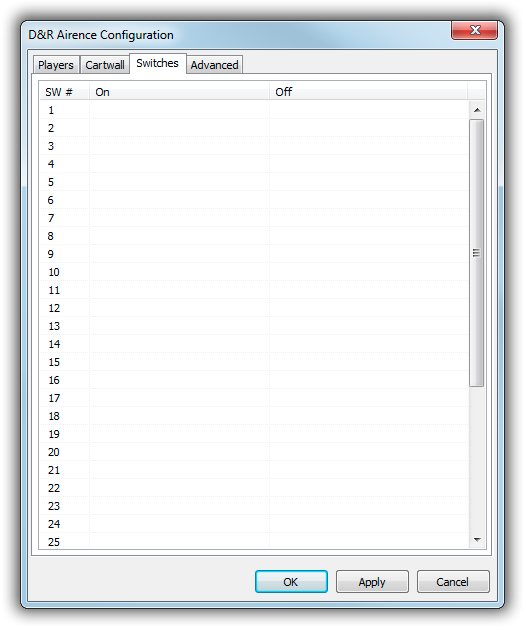
If you are going to use any of the push buttons for any other purpose than the cartwall, you can assign remote control commands to them:
Just select any of the available commands from the dropdown list, or type one manually. The “On” command will be executed when you press the button, the “Off” command will be executed when you release the button.
There are 38 buttons:
- 1-8: Cartwall buttons, row “A”
- 9-16: Cartwall buttons, row “B”
- 17-24: Customizable buttons below the cartwall buttons (scroll, play, etc.)
- 25: “Encoder” button
- 26: “Non-stop” button
- 27: Fader start, USB 1
- 28: ON button, USB 1
- 29: CUE button, USB 1
- 30: Fader start, USB 2
- 31: ON button, USB 2
- 32: CUE button, USB 2
- 33: Fader start, USB 3
- 34: ON button, USB 3
- 35: CUE button, USB 3
- 36: Fader start, USB 4
- 37: ON button, USB 4
- 38: CUE button, USB 4
- 39: Rotary encoder, on=right, off=left, you can use
$VALUEinside the remote control command as a placeholder for the current encoder value (0..255).
Advanced
On the Advanced tab, you can adjust some internal parameters of the AIRENCE connection. Do this only if instructed by the support.
Scripting
The AIRENCE remote offers an interface which can be used to communicate with the console from a script. To access the interface, use the following function:
function AirenceRemote(iIndex: integer): IAirenceRemote;
Remotes are 0-based, so AirenceRemote(0) will return a reference to the first remote in the system.
At the time being, the IAirenceRemote interface offers two useful functions:
procedure SetLED(iNumber: integer; iColor: TAirenceColor);
procedure SetLEDBlink(iNumber: integer; iOnColor, iOffColor: TAirenceColor; iSpeed: TAirenceBlinkSpeed);
The first one sets an LED of one of the push buttons to a particular color, the second one does the same, but with flashing. The available button IDs are:
- “A” buttons: 0 (Button 1A) to 7 (Button 8A)
- “B” buttons: 8 (Button 1B) to 15 (Button 8B)
- Buttons in the lower part: 16 to 23
- 255 (hex
$FF): All buttons at the same time
The available color values are:
acNone(no color, LED off)acRedacGreenacYellow
The available blink speed values are:
absSlowabsNormalabsFast
A complete call for illuminating Button 1B on the first Airence unit, blinking fastly in red color, then should look like this:
AirenceRemote(0).SetLEDBlink(8, acRed, acNone, absFast);


