Table of Contents
Multi Instance Playout
This tutorial explains how to set up a multi instance playout server with mAirList: A single computer that hosts multiple mAirList playout processes, usually each creating one or more Shoutcast/Icecast streams.
Multi instance installations can be set up on ordinary PC hardware, or on Windows servers hosted in datacenters – if you are only going to create Shoutcast/Icecast streams (no local audio), no audio hardware is required.
How It Works
mAirList keeps all configuration and data in it's data folder, which defaults to C:\ProgramData\mAirList\<Version> for ordinary setups created with the installer. (Note that it's “ProgramData”, not “Program Files”!).
By using special command line parameters, it is possible to specify a different folder as the main data folder (or parts thereof), and thus having multiple ``mAirList.exe`` processes (instances) running at the same time, and using separate configuration sets.
Our *Multi Instance Manager* application facilitates this process, but you can also specify these parameters manually. Both options are described in this article.
Prerequisites
Each mAirList license is valid for a single playout instance only. In order to run multiple playouts on the same computer, you will need
- either a separate license per playout instance,
- or a special multi-instance playout license (available as a paid add-on for mAirList Professional – please contact sales@mairlist.com).
(Without any of these two, you can still use the multi-instance setup to manage multiple configurations, but you can only use one at a time.)
All instances will have a separate configuration and can use any kind of scheduling backend. If you use mAirListDB for scheduling, you will probably want to set up mAirListDB Multi-Station first.
Multi Instance Manager
Multi Instance Manager is a small piece of software, available at no charge, that facilitates the management of the various configurations and playout processes in a multi-instance setup. It is now the preferred method to set up a multi-instance playout machine.
Download and install Multi Instance Manager
Multi Instance Manager is available for download here: http://download.mairlist.com/MultiInstanceManager/
It comes as a .zip file without any installer. Just unzip anywhere, e.g. on the Desktop. The configuration will be stored in an .ini file inside the same folder.
Do NOT unzip the software anywhere inside C:\Program Files, or any other folder restricted by the Windows User Account Control! The Desktop, or a custom folder like C:\mAirList, is a good choice. As you will require a separate data folder per instance (see below), we suggest you create a directory structure like this:
C:\mAirList\MultiInstanceManager (<-- unzip here)
C:\mAirList\Instances\01-firstinstance (<-- data folder for first instance)
C:\mAirList\Instances\02-secondinstance (<-- data folder for second instance)
etc.
Download and install mAirList
If you haven't done so already, download, install and activate mAirList now. You can use a setup or zip distribution.
In this tutorial, we use mAirList 6.1, installed through the ordinary setup:
- Executable files are in
C:\Program Files (x86)\mAirList 6.1. - (Default) data folder is
C:\ProgramData\mAirList\6.1(you can verify this in mAirListConfig → Advanced → Data Folders).
Configure Multi Instance Manager
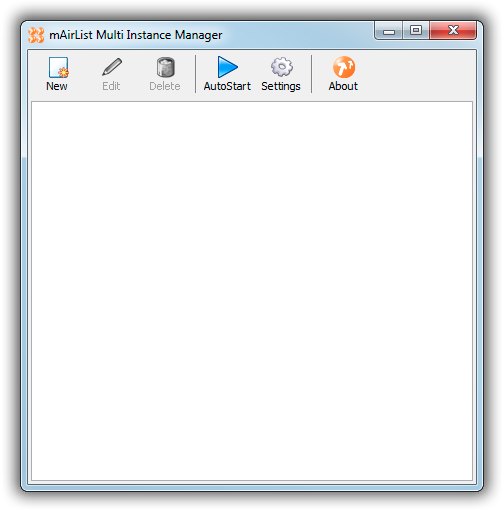
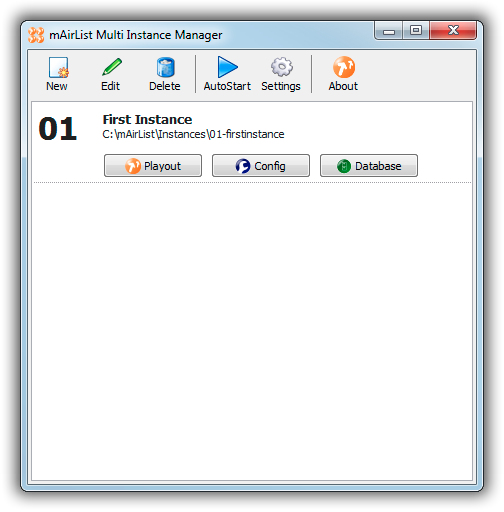
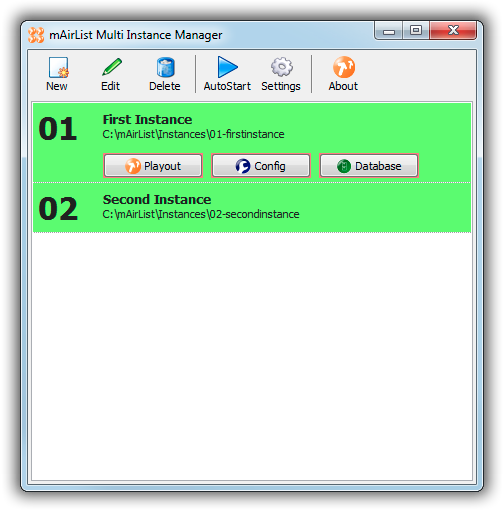
Now open MultiInstanceManager.exe – the main window will look like this:
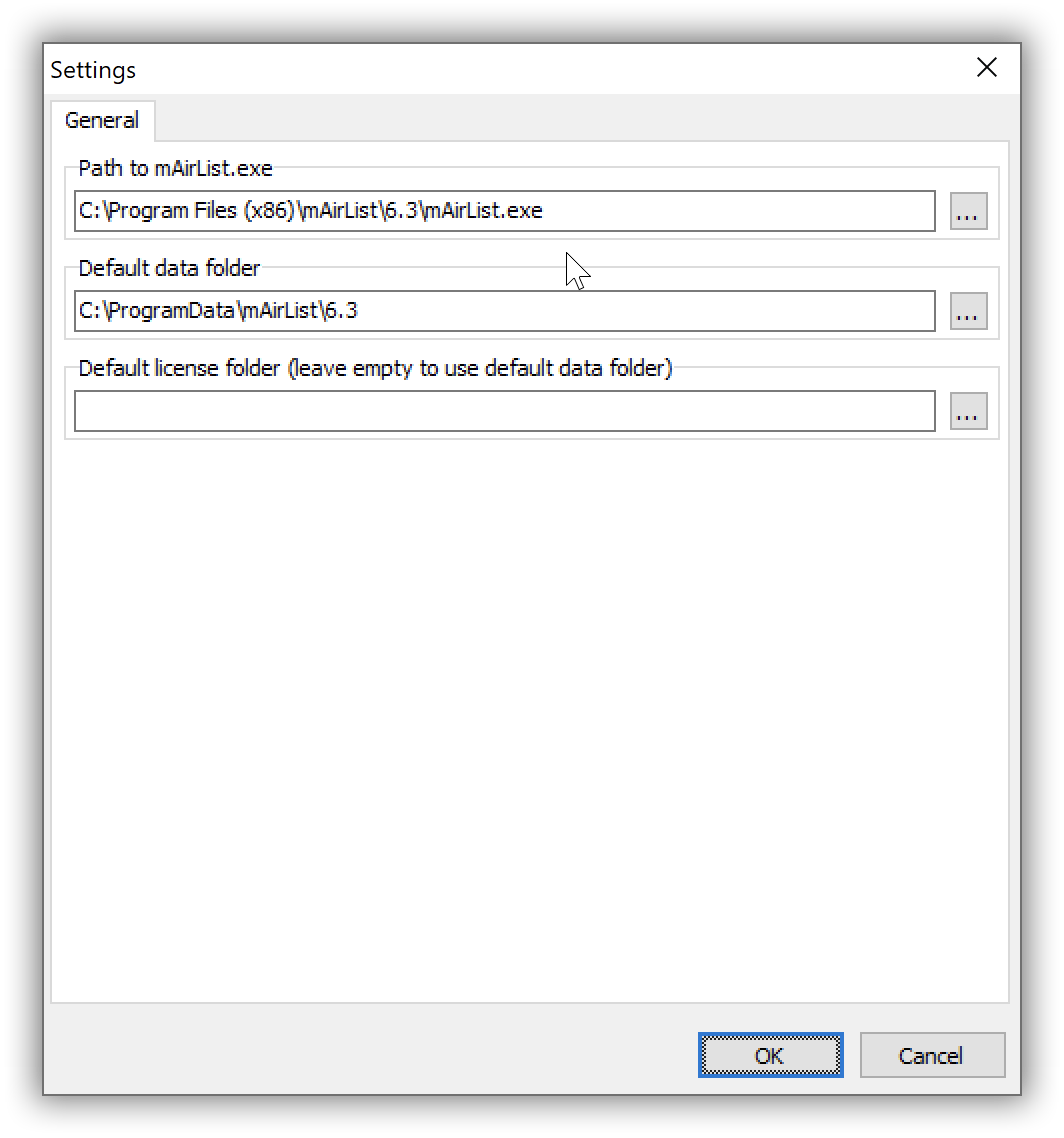
First, we click Settings and enter the location of mAirList.exe (path and filename) and the default data folder:
Default license folder can be left empty, as it is the same as the default data folder (where the license.lic file is located).
Add the first instance
We are now ready to add our first instance. Each instance needs a data folder where it will store its configuration and temporary data.
It is a good idea to create a folder on your hard disk where all these instance data folders are located. In our example, we created a folder named C:\mAirList\Instances, where each instance will have another subfolder as its data folder:
C:\mAirList\Instances\01-firstinstance
C:\mAirList\Instances\02-secondinstance
C:\mAirList\Instances\03-thirdinstance
...
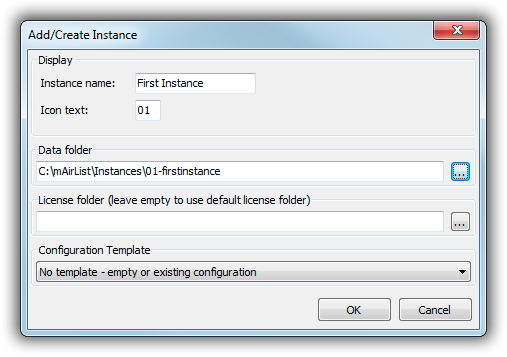
To add the first instance, click New in the main window toolbar:
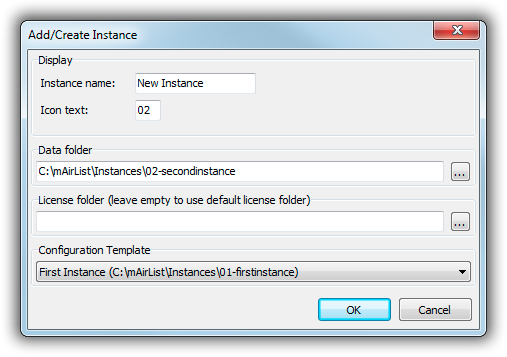
Specify the name, icon text and data folder for this instance. The icon text is one or two characters that will be displayed as overlay on the task icon in the Windows taskbar, so you can easily identify the mAirList process in the taskbar.
License folder can be left empty, as we use the multi-instance license file installed in the default data folder.
Configuration template is set to no template, as we start with an empty configuration here. It's also possible to copy over the configuration from the default data folder (C:\ProgramData\mAirList\6.1) if you are migrating from a single-instance setup.
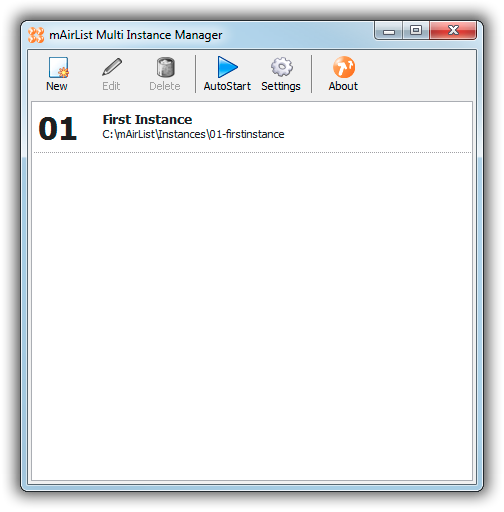
Click OK, and your instance will appear in the main window:
Configure the first instance
It is now time to configure the first instance. When you select the instance in the list in the main window, three buttons Playout, Config and Database will appear, allowing you launch the respective apps for this instance:
You can now set up the instance as required, adding database connections, events, actions etc. – just as you would do in a single instance setup.
Add another instance
Once the first instance is set up, we can continue with the second instance:
Note that we are using the first station as the configuration template this time – the Multi Instance Manager will simply copy over the contents from the initial data folder to the data folder of the newly created instance. This is a very convenient way to duplicate the configuration to a new instance when all of your instances are configured in a similar way.
Auto Start
Using the Auto Start feature, you can easily start up all “production” instances with a single click.
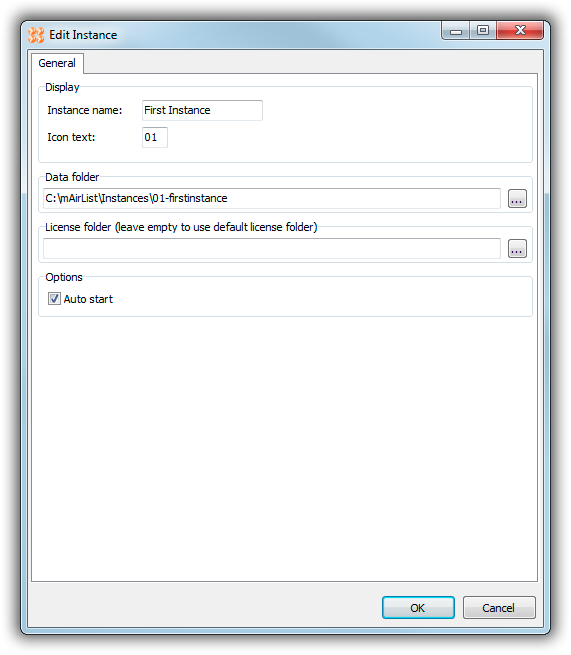
To mark an instance as Auto Start, edit its properties and check the Auto Start option:
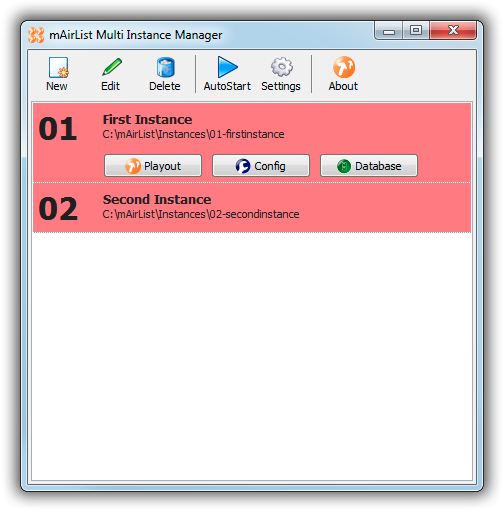
All Auto Start instances that are not currently running will be displayed using a red background:
Now click the Auto Start button in the toolbar – the playout will be started for all instances, and they turn green in the list:
When you run MultiInstanceManager.exe with the --autostart command line parameter, it will start all Auto Start instances automatically when it launches.
Manual Management of Instances
Using the Multi Instance Manager is the preferred way of managing a multi-instance setup now.
It is also possible to manage the instances manually if you prefer, which is described in this section. There are two ways to do this:
- Use the ZIP distribution, or
- use separate data folders and an appropriate command line switch (mimics the function of the Multi Instance Manager).
Option 1: ZIP distribution
All mAirList versions are available as a ZIP file from the Download page. That ZIP file does not include an installer, so you don't install those versions into C:\Program Files, but instead, you just unzip them anywhere you like.
There is another notable difference between the “setup” installations and “ZIP” installations:
The normal setup installation stores all mAirList configuration data in the system-wide ProgramData folder C:\ProgramData\mAirList\<version> – this is the place Microsoft recommends for all program-related configuration and data, as a normal user will not have write access to C:\Program Files anymore since Windows Vista.
The ZIP distribution, however, stores the configuration directly inside the program folder. That means that you can have multiple mAirList installations side-by-side, each with a separate config, just by unpacking the ZIP distribution multiple times, or duplicating an existing program folder.
(How can mAirList tell whether it is a ZIP distribution or not? In other words, how does mAirList tell whether the config should go to C:\Program Files or rather in to the program folder? mAirList checks if there is a folder named config in the same folder as mAirList.exe. If there is, it assumes “ZIP-style” installation with config inside the program folder; if not, it will use C:\ProgramData. Bottom line is, if you want to duplicate the program folder to make separate configurations, always make sure that there is a config subfolder inside the program folder. The ZIP distribution comes with an empty config folder for this purpose.)
So in order to install multiple mAirList instances using the ZIP distribution, simply unzip it to multiple locations. Or prepare the base configuration of the first instance, then make copies of that folder.
Option 2: Separate data folders
We learned above that mAirList will usually put all configuration into C:\ProgramData\mAirList\<version>, the so-called root data folder. However it is possible to override this folder using the command line switch -rootfolder. For example:
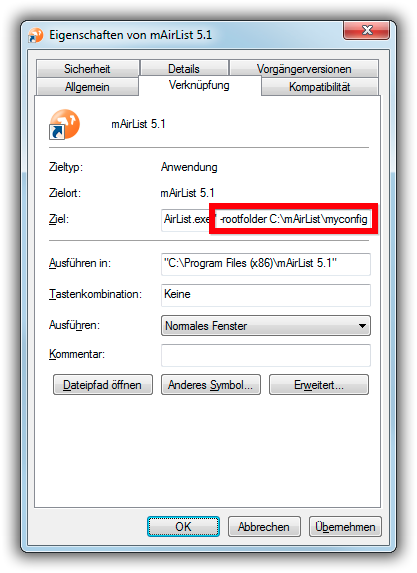
mAirList.exe -rootfolder C:\mAirList\myconfig
will use C:\mAirList\myconfig as the root data folder. Likewise, you can run the config application for that data folder with
mAirList.exe -mode config -rootfolder C:\mAirList\myconfig
You can easily create a shortcut to mAirList.exe on your Desktop (or somewhere else), open its Properties, and add the -rootfolder parameter to the Target field:
So in order to set up multiple mAirList instances, just create one or more root data folders (initially empty, or a copy of an existing root data folder), and a set of shortcuts (at least for the playout and config app) with the appropriate -rootfolder command line parameter.
Window Title and Icon
The more instances are running at the same time, the harder it gets to tell them apart when looking at all the mAirList processes and windows.
To make life easier, edit the gui.ini file in the config folder of each instance, and add the following lines:
[Instance]
Name=My First Station
IconText=01
The Name will be displayed in the mAirList window title and application title (in Windows Task Bar).
The IconText will be displayed in the mAirList icon in the Windows Task Bar. Maximum number of characters is 2. This works on Windows 7 and above, and Windows Server 2012 and above.
