Table of Contents
Music Scheduling with mAirListDB (mAirList 4)
This article applies to mAirList 4.x. For mAirList 5, see the updated tutorial.
In this article, we will show you how to import your audio files into mAirListDB and set up music scheduling for 24/7 automated operation (or live assist, or mixed).
We assume that the mAirListDB connection has already been set up as described here:
- SQLite backend setup (local mode)
- PostgreSQL backend setup (networked)
You should be able to run the mAirListDB application (“database window”) from the Windows Start Menu (mAirList (Version) → Database).
Step 1: Add Audio Folders as Storages
mAirListDB keeps a list of your audio files in its Library, so the first step is to tell mAirListDB where your audio files are. We do this by registering one or more Windows folders (on your local hard driver or a network share) as storages. (In future versions, it might be possible to use other locations, e.g. servers in the cloud etc. - that's why the term “storages” is used instead of “folders”).
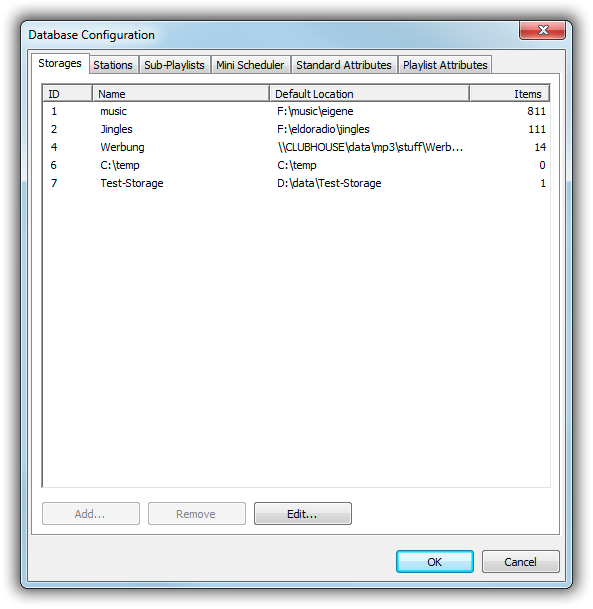
So go to Administration → Configuration → Storages and add one or more folders.
Do not add individual subfolders of another storage! mAirListDB will automatically scan all subfolders!
You will be able to enter a name and description for each storage that will later appear in the menus - by default, the name is just the folder name.
When you're done, click OK - you will be prompted to restart mAirListDB.
Step 2: Synchronize Storages
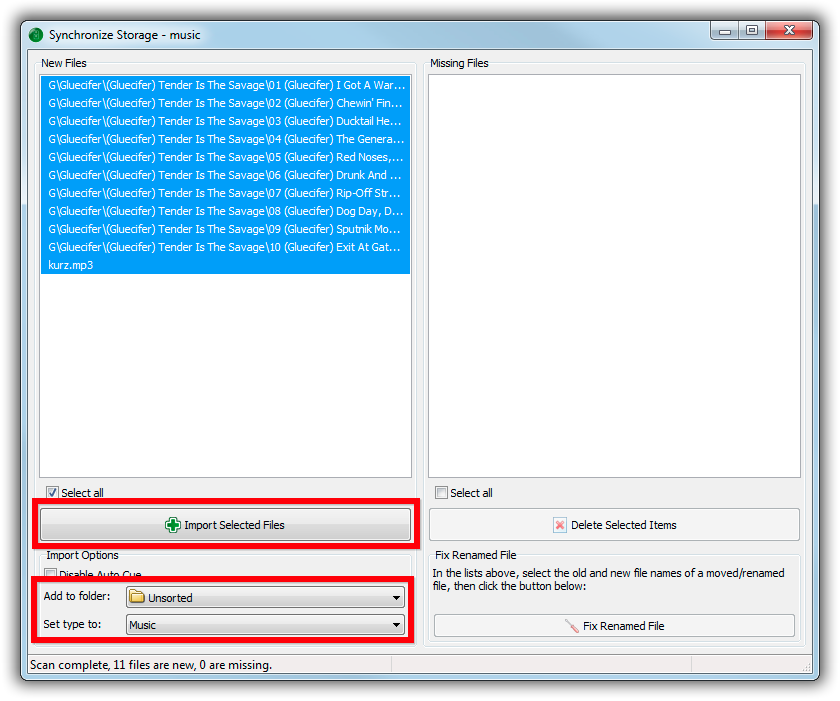
Now we are ready to scan your hard drive (the registered storages) for audio files. Click the Synchronize button, select the desired storage (if you have registered more than one), and the Synchronize dialog will appear:
When the scan is complete, the list of new files (not yet part of the Library) is displayed on the left hand side. By default, all new items are selected, but if you don't want to import everything at this time, you can select individual items or a range of items with the mouse (hold down Ctrl or Shift and click).
It's a good idea to set the type of these files to “Music” (or whatever it is) at this point, in the Import Options section. You can also specify the virtual folder that the items should go into - as we haven't set up any folders yet, it's simply the Unsorted folder.
When ready, click Import Selected Files, and mAirListDB will open each file, analyze it (read tags, perform Auto Cue etc.), and add it to the Library.
When you add more files to your audio folder, you can return to the Synchronize dialog at any time and repeat the steps. If you happened to delete files, they will appear in the right-hand side list, and you have the option to remove them from the Library.
Step 3: Set up Virtual Folders
Your audio files have now been imported into the Library, but they are still in the Unsorted folder.
Now it's time to create a couple of library folders and sort your audio files into them. Library folders are purly virtual - they only exist in the database and are independet of your actual windows folders. You may or may not use the same folder structure as on your disk.
The virtual folders will later serve as music categories (or rotations).
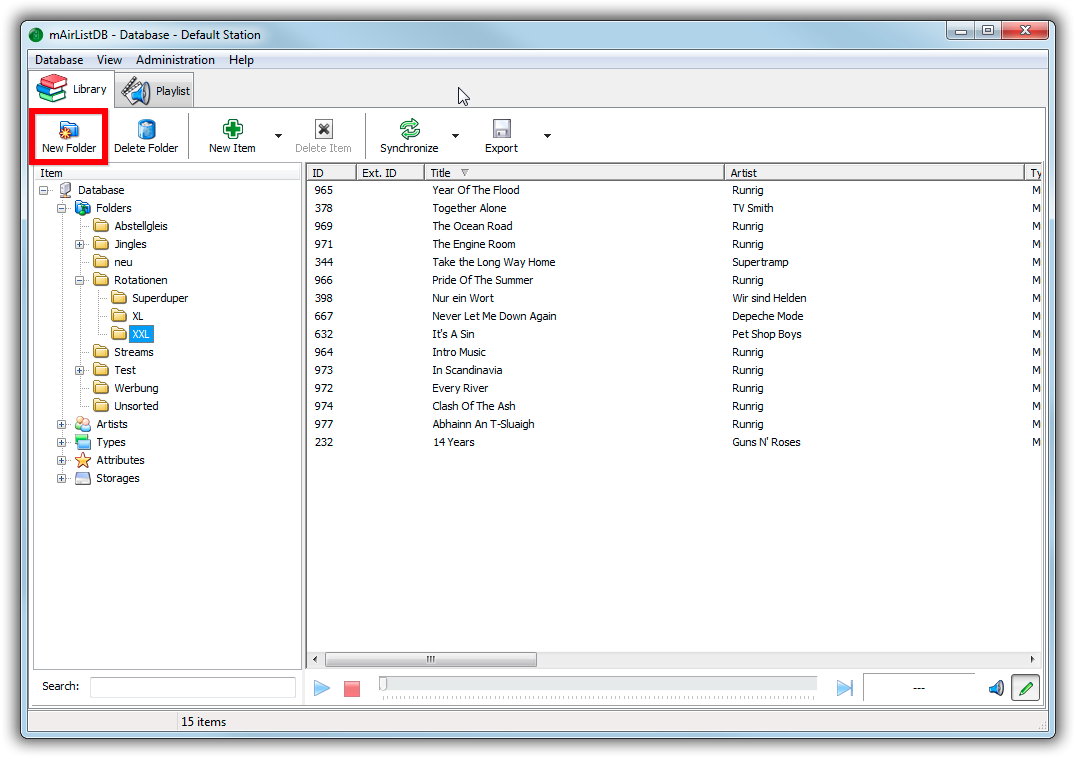
So go to the Library tab and use the New Folder button in order to create one or more folders, then go to the Unsorted folder and move the audio files to the respective folder using the mouse (drag them from the list to the folder node in the tree on the left).
Hint: If you are going to resemble the folder structure from Windows, it's a good idea to sort the item list by Filename (click the header), and then select a range files from the same Windows folder with the mouse while holding down Shift.
Step 4: Create Hour Templates
Music scheduling in mAirListDB works in an hourly grid, so we will be generating playlists worth 60 minutes each.
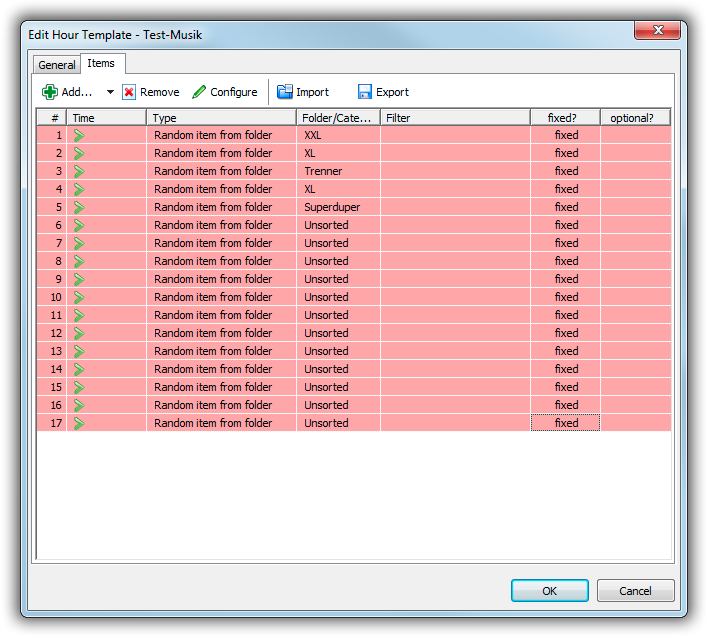
Go to Administration → Manage Hour Templates and add a new template. Enter a useful name, then go to the Items tab. The list will be blank initially. Use the Add button (and the menu behind the small arrow next to it) to add one or more entries to the template - each entry in the template represents one song in the resulting playlist.
The most useful entry type is Random item from folder. Specify the desired folder (use the dropdown that appears when you click a row in the Folder column, or double-click and edit it), and the scheduler will pick one item from that folder and add it to the playlist.
You can have an unlimited number of templates, e.g. one for daytime music, one for nighttime, one for an 80s special show etc.
Some hints regarding hour template design:
- You can drag entries around by clicking them in the left-most column and moving them with the mouse.
- The number of entries you need to fill an entire hour depends on your particular music library. Usually 16 is a good number to start with. You can add extra entries at the end and mark them as optional (double-click the optional? cell) - the scheduler will only use them to fill up the playlist until 60 minutes are reached.
- If you want jingles in between the songs, make a Jingles folder and insert it into the template e.g. after every two or three songs.
Step 5: Set up Hour Template Assignment
As mentioned earlier, you can easily setup multiple hour templates, each with a different kind of music. The missing piece of the puzzle is to tell mAirListDB which template to use on which day of the week and for which hour.
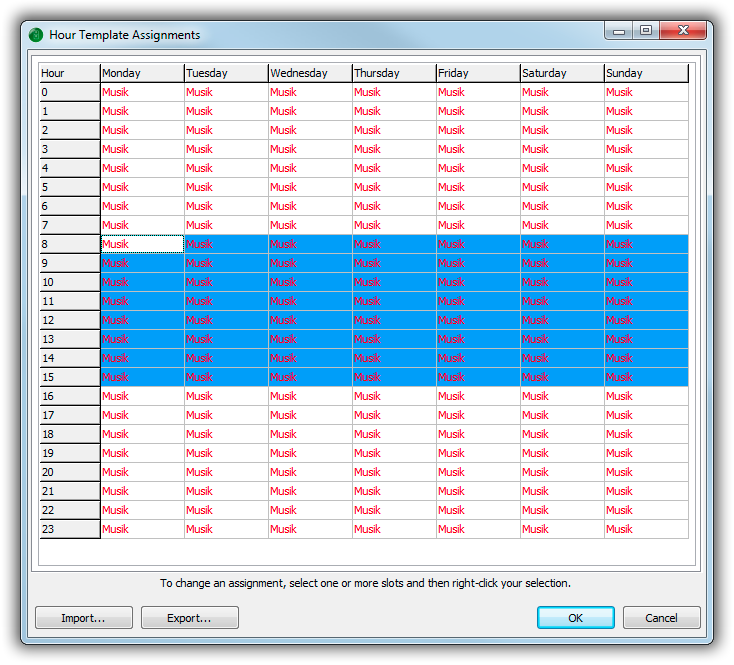
Go to Administration → Configuration → Hour Template Assignments, and the following dialog will show up:
The 24×7 grid is initially empty - to set an assignment, select a range of hours/days with the mouse (hold down the left mouse button), the right-click and select the desired template. Repeat the steps until a template is assigned to all 24×7 slots.
Step 6: Generate Playlists
Ok, we're ready to generate playlists now.
Generate a Single Playlist
To generate a single playlist for a particular date and hour, go to the Playlist tab of mAirListDB and navigate to the desired hour.
Then click the small arrow next to the Generate button in the toolbar, and select the hour template from the list. The scheduler will generate a playlist and display it in the playlist editor. Click Save to save the playlist to the database.
Generate Multiple Playlists
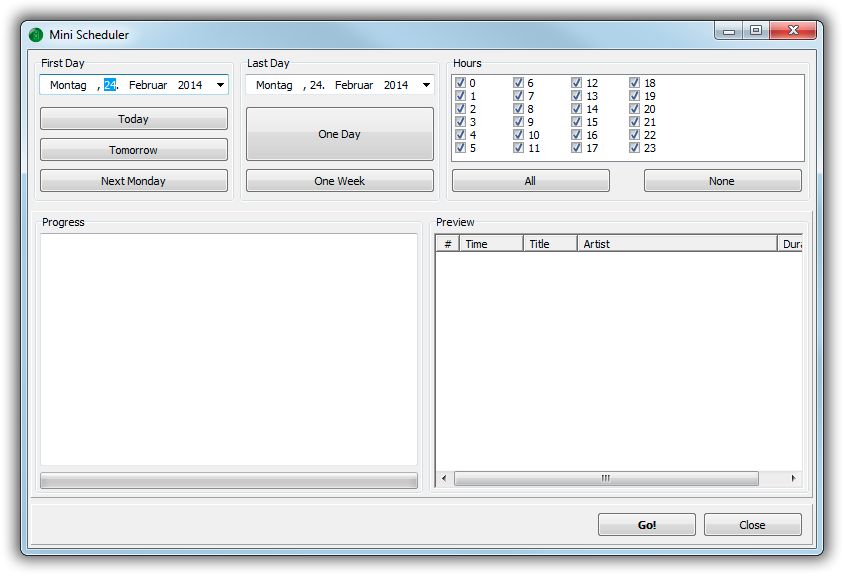
Usually you wouldn't generate the playlists one by one, but schedule an entire day or week at once. This is where the Mini Scheduler dialog comes into play. To open it, click Generate in the toolbar.
In the upper left section, select the start and end date for which you are going to generate playlists. Use the buttons as shortcuts for some common start days and perios.
In the upper right corner, check the hours for which playlists should be generated on the selected dates. Default is all hours (that is, all hours for which a template is assigned, see notes about hour template assignments above).
Then click Go and lean back while Mini Schedule does its job. When generation is finished, close the dialog and navigate through the playlists (and possibly edit them) in the playlist editor.
Step 7: Access Playlist in Live Assist
Now that we have playlists prepared for the current hour (and the next hours, days, …), we can return to the playout window (main window) of mAirList and use them.
Database Playlist Browser
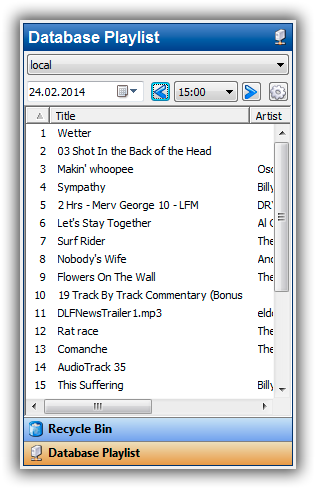
In a Live Assist situation, the presenter will probably want to load the playlist manually shortly before the hour. That's what the Database Playlist browser is used for. Click the small arrow next to the Add button in the browser section of the playout window, then select Database Playlist. The following tab will be added to the browser:
The drop-down box at the top is used to select the database connection, in case you have set up multiple databases - otherwise it is not visible.
Below that you will find the controls to navigate through the hours. The playlist for the selected hour is display instantly as you switch between the hours. To load the list into the playout playlist, click the small “gear” button, and select one of the commands (load/append/…) from the menu.
Set up an Hourly Event for Automation
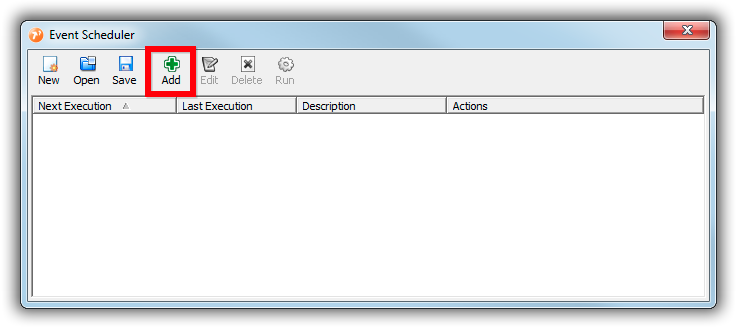
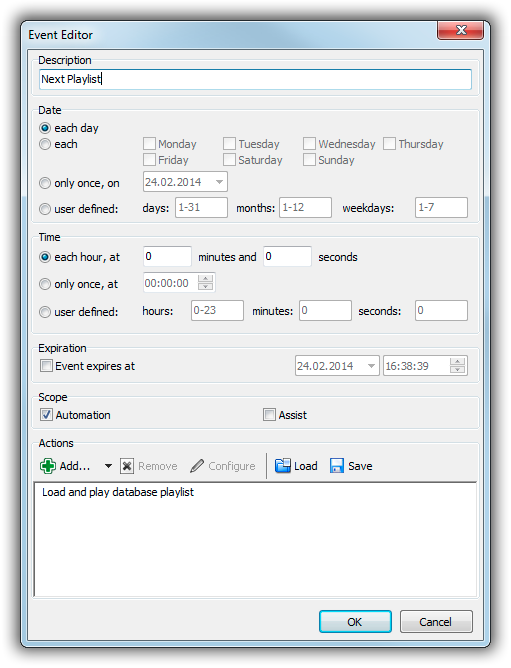
In an automated environment, mAirList must load the playlist for the next hour automatically at the top of the hour. This is achieved by adding a (single) event to the Event Scheduler. Click Events in the main toolbar, and in the dialog that appears, click Add to add a new event.
The event is configured so that it runs each day, each hour at 0 minutes and 0 seconds (see screenshot). In the Actions section, add a new Load and play database playlist action, and leave all of its settings untouched.
That's it - at the top of the hour, mAirList will grab the next playlist from the database and play it. All you have to do is to turn on AUTO mode.
