Table of Contents
Stream Monitor
The Stream Monitor lets you pick up incoming Shoutcast/Icecast streams as they become available, re-broadcasting them instantly. It is designed to be a convenient way to incorperate live streaming (from a home DJ, or an outside broadcasting event) into a 24/7 automated mAirList system.
You can enter any number of stream addresses, which mAirList will monitor periodically, every few seconds. As soon as a stream becomes available, mAirList will play it on a defined sound card. The running automated program can be stopped (via actions), or muted (using the Encoder High Priority input, see below).
Typically you will need a “private” streaming server that will relay the incoming stream(s) to mAirList. The DJ connects to that private server, mAirList picks up the stream, and rebroadcasts it to the public server. Outside the hours of this live streaming, the private stream should be offline.
We recommend using Icecast for that private stream – we found that Shoutcast does not work so well because it may buffer old portions of audio (from the previous broadcast) and send that to the listener (Stream Monitor) first when the new broadcast starts.
Adding Streams
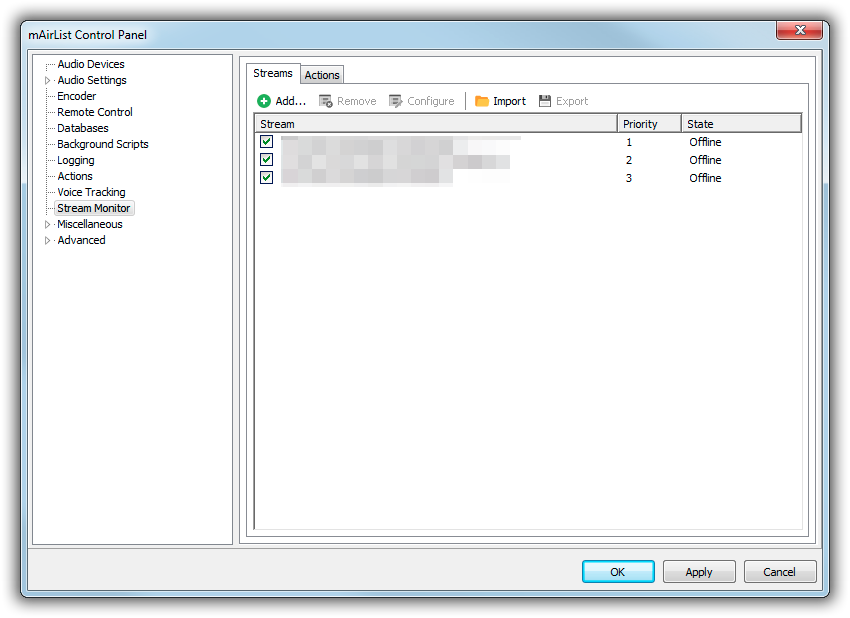
Stream Monitor settings are manage in the configuration app, or Control Panel, on the Stream Monitor page.
On the first tab Streams you, see a list of incoming streams, along with their state. Click Add to add a new stream:
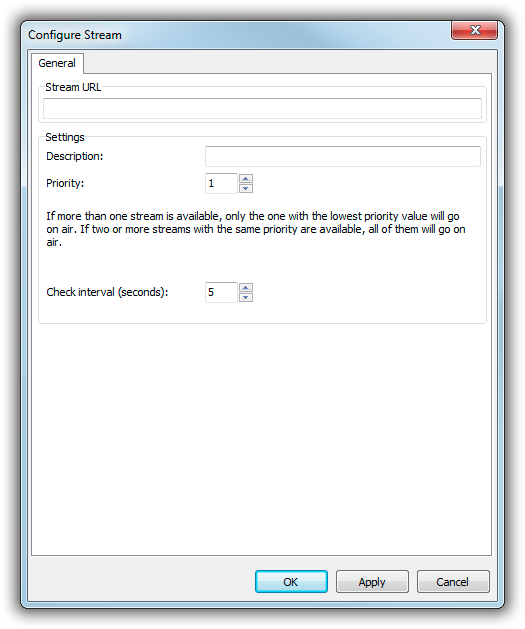
Enter the stream URL (any Shoutcast/Icececast HTTP URL is supported) and an optional description.
Each stream has a priority. If more than one stream is available, only the one with the highest priority (lowest priority value!) will be picked up. If there is more than one stream with that lowest priority value, all of them will be rebroadcasted at the same time.
The check interval defaults to 5 seconds, which means that mAirList will try to connect to the stream every 5 seconds. Higher values decrease the network/CPU load, lower values make sure that the stream is picked up instantly (without any significant delay) when it becomes available. We found that 5 seconds is a good trade-off.
Actions
On the Actions tab of the Stream Monitor configuration page, you can define two lists of actions:
- When on air: Will be executed when rebroadcast of the first stream starts (if two streams with the same priority are picked up at the same time, the action list is executed only once, for the first of them).
- When off air: Will be executed when the last stream disconnects.
In these action lists, you can do things like stopping/starting the automation, sending commands to your audio switcher, etc.
Audio Routing
The audio output for the Stream Monitor is set on the Audio Devices page in the config app or Control Panel. You can route the output to any soundcard or the encoder.
The Stream Monitor works best when running on an automated system where the automation is playing directly into the encoder, not any physical sound card. In that case, you can use the Encoder High-Priority Input. Set up your audio routing as follows:
- Player/Cartwall output: “Encoder” (primary or secondary)
- Stream Monitor output: “Encoder - High Priority”
The High Priority input will mute the regular encoder input as soon as any audio item is sending data to it. So your automated playlist will continue to play in the background, but it is automatically muted as long as the Stream Monitor is rebroadcasting any stream. When the stream ends, the encoder input will be unmuted again. Logging will also be disabled while the input is muted.
Metadata
Metadata (title updates) received from upstream are automatically forwarded to all outgoing stream connections if all of the following conditions are met:
- Stream Monitor plays directly into the encoder (output device is set to one of the “Encoder” devices)
- “Forward incoming stream metadata” is checked in the metadata settings of each encoder connection
- “Stream” is checked in the item type filter in the metadata settings of each encoder connection

