Table of Contents
MusicMaster Nexus API Setup
This tutorial describes the necessary steps to set up a connection between the MusicMaster Nexus Server and mAirList.
The Nexus server connection is used e.g. for:
The information in this tutorial is current as of mAirList v6.1.
What is MusicMaster Nexus?
The Nexus API is an HTTP-based protocol provided by MusicMaster that allows third-party software like mAirList to access and manipulate the MusicMaster database (library and schedule).
The Nexus server is part of the MusicMaster software package (MMServer.exe or MusicMaster Plus Server). Please contact your MusicMaster sales representative or support contact to check if it is available in your license.
Prerequisites
Nexus Server
We assume that you have MusicMaster and the Nexus server installed and running. The actual setup and configuration of MMServer or MusicMaster Plus Server is not part of this tutorial.
The Nexus server should be accessible from your mAirList PC via an URL like http://127.0.0.1:8080/ (running on the same PC) or http://192.168.5.77:8080 or http://somehostname:8080 (some PC on your network – don't forget to open the port on your firewall). We will need that URL in a minute.
MusicMaster provides a test application (MMServerTest.exe) that you can use to check if the connection is working,
Memo Field for XML Metadata
In the Nexus API configuration, you will be able to link mAirList metadata fields to MusicMaster fields, and vice versa. However MusicMaster does not provide adequate field types for any kind of mAirList metadata. mAirList will store an additional copy of all of its metadata as XML in a Memo field inside MusicMaster. You must prepare this field (we propose you call it mAirListXML) in the MusicMaster Database Field Editor.
mAirList Setup
Open the mAirList configuration app, and go to Databases → Nexus API. Click Add to add a new connection to a Nexus Server.
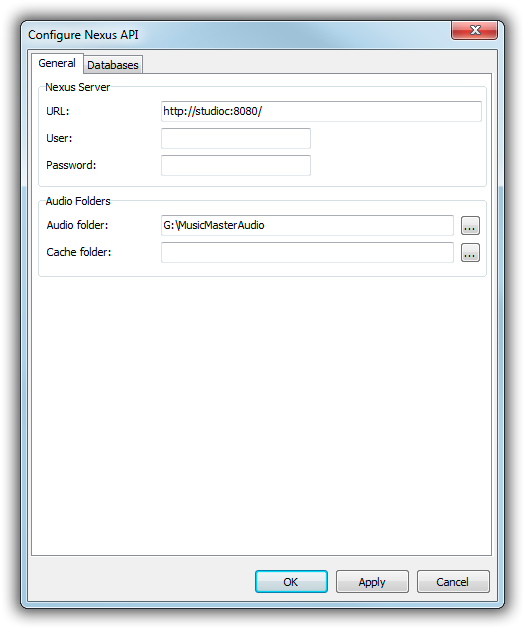
First, go to the General tab:
Set up the URL of your Nexus server (remember that it's an HTTP-based protocol), usually in the form
http://<IP of Nexus server>:<port>/
User name and password are usually not required, but we support HTTP basic authentication if you plan to work with a reverse proxy and password protection. SSL is also supported (just enter an https URL).
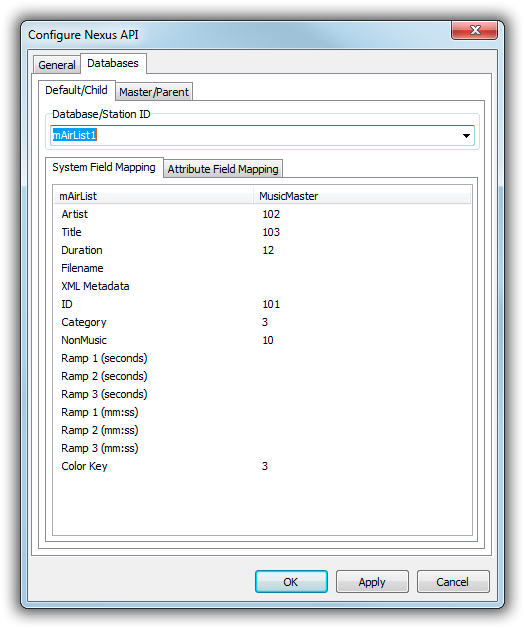
On the Databases tab, we select the MusicMaster database within the Nexus server (each Nexus server can serve multiple MusicMaster databases). (For an explanation of the Default/Child and Master/Parent tabs, see the section on MusicMaster Enterprise below.)
First, type the name of the MusicMaster databases, as defined in the Nexus server configuration, or click the dropdown arrow to select it from the list. The latter will also serve as a connection test, as it will query a list of available databases directly from the Nexus server.
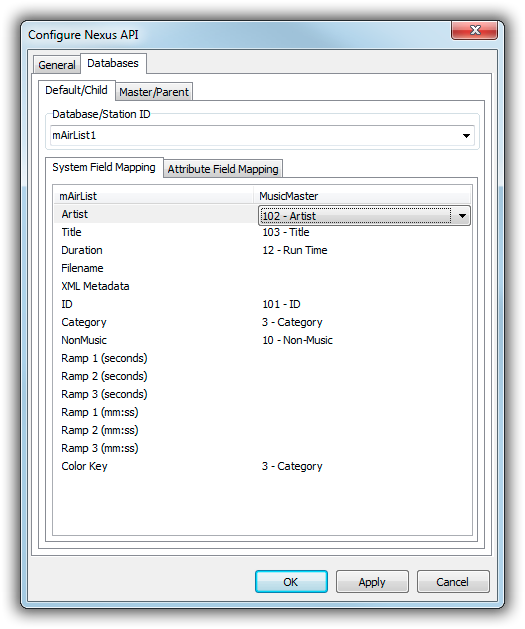
On the System Field Mapping tab, we link some MusicMaster fields to mAirList's internal metadata fields:
- Artist
- Title
- Duration
- Filename
- XML Metadata
- ID
- Category
- NonMusic
- Ramp 1 (seconds)
- Ramp 2 (seconds)
- Ramp 3 (seconds)
- Ramp 1 (mm:ss)
- Ramp 2 (mm:ss)
- Ramp 3 (mm:ss)
- Color Key
When you enter the dialog for the first time, only numeric IDs will be displayed. As soon as you use the dropdown for any field, mAirList will fetch the field names from the Nexus server:
Notes:
- XML Metadata is the Memo field that you created in order to save non-standard metadata fields as XML (see Prerequisites section above).
- The ID field is where mAirList will save its Internal Database ID values during mAirListDB library synchronization. It is also used by the direct Nexus database connection to reference items in an external database.
- Ramps can either be stored (and retrieved) in “full seconds” or “mm:ss” format. Just fill out the field mapping for the format that you wish to use, and leave the other one empty.
- Color key is used by the Nexus database connection to color items based on a particular field, e.g. the Category field.
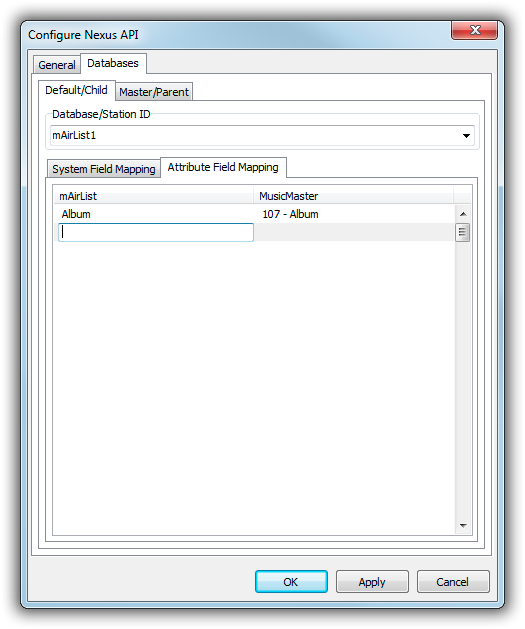
On the Attribute Field Mapping tab, you can link additional attribute fields in mAirList to fields in MusicMaster:
Just type a mAirList attribute name in the left-hand column, and select the corresponding MusicMaster field in the right-hand column. Use the cursor-down key to add more rows.
MusicMaster Enterprise
MusicMaster Enterprise is a feature of MusicMaster where you have one “parent” database that holds the metadata for all songs, which is then replicated to one or more “child” databases, where the actual scheduling takes places.
The Nexus functions mAirList will handle Enterprise databases in the following way:
- All library write operations will be performed on the parent database.
- Library read operations during mAirListDB library synchronization will also be performed on the parent database.
- All schedule read operations and their corresponding library lookups will be performed on the child database.
One important thing to understand is that the MusicMaster field IDs can (and often will) be different between the parent and the child databases. So you must actually configure the field mapping twice in mAirList: once for the parent database, and once for the child database.
To set up a Nexus connection to an Enterprise database, switch to the Master/Parent tab, select the Database that is the “master” database in the Enterprise setup, and set up the field mapping.
For non-Enterprise databases, it is important to leave the Database/Station ID field empty for the Master/Parent database!


